

BitLocker To Go allows you to encrypt a USB drive and restrict access with a password.
Setting up a USB drive with encryption
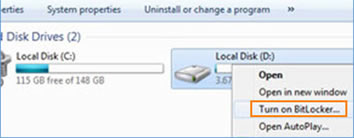
1. Insert a USB drive. If prompted with an AutoPlay dialogue window, click or tap X to close. Right-click the USB drive. A drop-down menu appears. Click or tap Turn On BitLocker...
2. BitLocker To Go will begin setting up your USB drive. This step will not delete any data that is already on the drive.
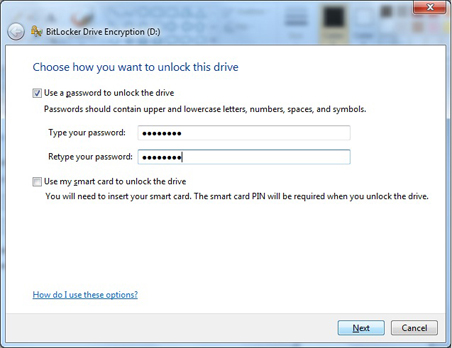
3. BitLocker To Go will prompt you to choose how you want to unlock the drive once it is encrypted. Select "Use a password to unlock the drive." Type your password choice, then retype the password. Click or tap Next.
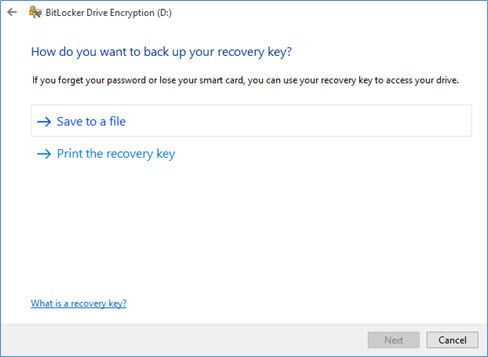
4. BitLocker To Go will prompt you to generate a recovery key, for use if you forget your password. (If you do forget your password, you will need the recovery key, or you will be unable to retrieve the files or use the USB drive.) Click or tap Save to a file.
5.
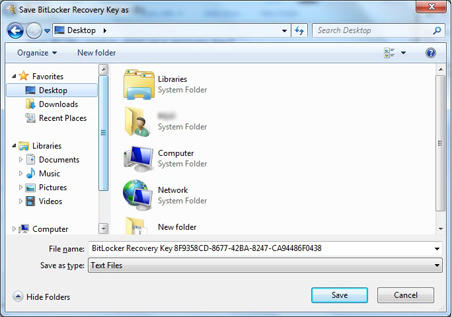
You are prompted to save the recovery key. Save the recovery key to an appropriate location, such as a network drive. Click or tap Save. (If you choose to save the key to your computer, Windows will warn you to save the key to a network drive. You will need to click or tap Yes to continue.)
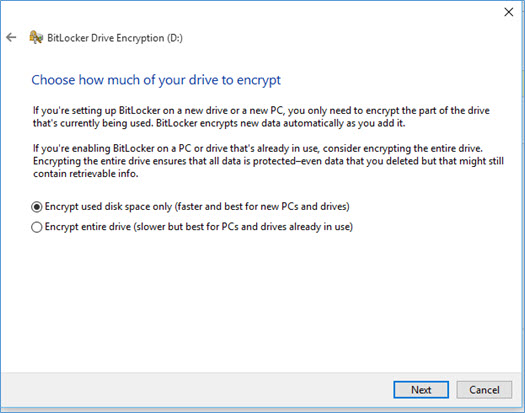
6. You can choose how much of the drive you want to encrypt. Encrypt the entire drive if you already have data on the USB drive. Click or tap Next. BitLocker To Go begins encrypting the USB drive.
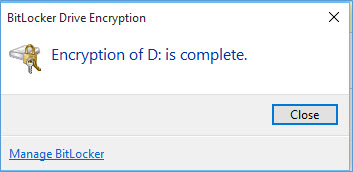
7.
Bit Locker To Go will notify you when complete. Click or tap Close.
8. Eject the USB encrypted drive. Re-insert the drive to confirm that you are prompted for the password. If prompted, your USB drive has been successfully encrypted.
Using a BitLocker To Go encrypted drive
Insert a BitLocker To Go encrypted USB drive into a Windows device.
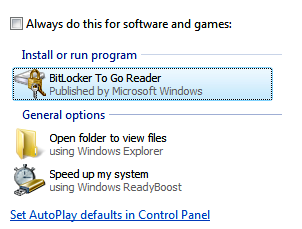
Depending on the version of Windows, you may see an AutoPlay dialog, prompting you to install the BitLocker To Go Reader. Install the reader if prompted.
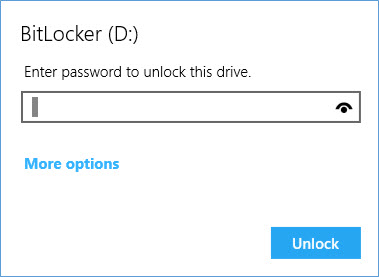
Otherwise, you will be asked for the password. Enter the password to proceed.
Click or tap Unlock.

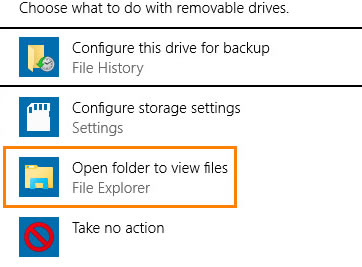
You will then be able to open the folder to view files.
If you have questions, please contact the IT Services TechSquad.
TRAINING & DOCUMENTATION
MORE ABOUT OUR SERVICES
Computer Labs & Smart Classrooms
Help with Computers & Printers
