- Online Course Development
- Online Program Development
- Program Guidelines
- Accessible Technology
- Center for Teaching and Learning
- Contact Us
- For questions about online teaching or course design, submit your questions to the Learning Technologies portal.
Walk-in Consultation Hours
Monday-Friday 9 a.m. - 3 p.m.
Room 326 Raynor Library
PROBLEM WITH THIS WEBPAGE?Report an accessibility problem
To report another problem, please contact emily.newell@marquette.edu.
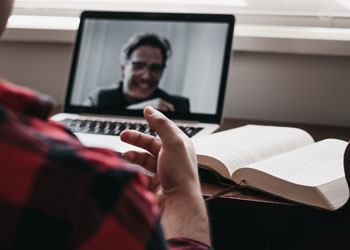
Microsoft Teams and recording video
Best Practices for Creating Video and Audio
Video Tutorial
Before Recording
- Make sure your laptop settings have the camera and microphone enabled
- Turn off notifications on your laptop, otherwise it will show up in the video
- Record in a quiet room and avoid outside interruptions
When on Camera
- Use a room with adequate lighting- don't film in front of a bright window and make sure your face is lit up (so no filming in an extremely dark room)
- Keep your clothing in mind- be careful of what words or phrases that may be on your clothing
- Check the room- make sure there is no inappropriate content in the background
- If recording on a cellphone always record Horizontally and NOT Vertically.
Content
- Content should be succinct and to the point
- Don't overload them with hours of videos
- Identify what information students need to know to come to class prepared to interact
- Connect content to learning outcomes
- Correspond video content with an assignment, quizzes, or research
i.e. watch this video on topic A and come to class with two points you want to make about the video you watched - Try and keep your videos to UNDER 10 MINUTES as its important to create succinct and focused lectures. If your content takes longer than that then consider splitting up your presentations into a few parts.
Creating Audio and Video
The following documents walk through the features on both PCs and MACs for creating narrated PowerPoints into videos, recording with your computer's camera, and making a screen recording. Feel free to think out of the box on how you can create different content to keep your students engaged and comprehending the information in the best way possible.
Recording your Screen and Slide Recordings in PowerPoint on a PC
Camera App on a PC
Voice over PowerPoint with a Mac
Using QuickTime for video and screen recording (MAC users only)
Editing Videos
Video editing can be done in a multitude of ways. While our department cannot supply or train others on video editing software, there is a series of recommended resources that faculty can look into.
- Camera App for PC: Allows a variety of editing options and a guide on how to use this App is located under Camera App on a PC above
- iMovie: This App is included on all MACs and edits videos simply and efficiently.
- YouTube Video Editor: Allows basics in sound and trimming videos.
- Camtasia: Screen Recorder and Video Editor which is simple and easy to use. There is also a free trial that you can try prior to purchase. Check with your department to see if anyone has a license to this software.
- Adobe Premiere Pro: Professional Editing Software which can be purchased on an individual basis. Best for those with previous editing experience.
Using Stream (On SharePoint) with D2L
After you have created media that you want to include in your course, the next step is to make sure they are all on Stream (On SharePoint) either by uploading videos into the site or using Teams Recorded links. Stream (On SharePoint) is a great resource to store your videos before linking them to D2L as D2L cannot fully support direct video and audio uploads onto the site.
After you have uploaded all of your video content to Stream (on SharePoint) or recorded it through Teams, the final step is to add the video content onto D2L. Sharing a video from Stream (on SharePoint) onto D2L is the best way to share and organize information with your students.
Student Media Projects
For Professors who need a Student resource to link Students to for course projects, the Student Media Creation webpage will have media creation guides and directions on how students should upload their videos, edit captions, and share their media content for any media related assignment you may supply. Please feel free to use the site as a resource to link in your D2L course page.
Using Teams to Create Media
Using Teams to record your lectures is a quick and efficient way to create videos for class. It is important to note that quality can come in second when creating your videos in this matter as Teams bases its recording off the quality of your internet connection. None the less, it is a very easy tool for you to use.
The most important thing to remember is where you are recording these lectures. Do not use the Teams site to record your lectures but rather one of the other various options listed below. These recorded meetings will be lectures for you to add to the content modules in your courses for students to watch asynchronously.
- Use the Calendar in the Teams App and use the Meet Now button
- Schedule a meeting with only yourself using the Teams or Outlook calendar
- Schedule a meeting with a guest speaker by adding them to the new invite and recording your conversation
- Teams meeting videos are set to automatically expire. Read instructions on how to manage Teams video expiration.
Types of videos
There are a series of different types of videos you can cover while recording through Teams whether using just the camera and audio or also using the variety of Share Screen options.
- PowerPoint presentation
- Screen recording
- A regular video with camera on
- Guest lectures/interviews
- Podcast focused (turn off your camera and the video will only show your Microsoft Icon)
Locating Teams Recordings
For meetings recorded within a Teams Site (those scheduled in a channel), the video will show up in the Posts section of the channel as well as in the Files tab which will now store all of the meetings recorded under that Teams site. For meetings outside of a Teams site, those recordings will now be located in OneDrive under a folder titled Recordings. For more information about these changes, please visit the webpage on Teams Meeting Recordings to Move to Teams Recordings Folder or Onedrive.
Internet Issues
While Teams is a great one-stop resource for you to record content for synchronous class sessions and to create asynchronous video content, there can still be issues that occur. It is very important that you keep in mind the quality of the videos you have recorded through Teams by watching through them and ensuring that you have a strong internet connection. Even if you are in a Teams meeting with just yourself, the App can still encounter issues and lag video or audio while it is recording. If you run into issues regularly while either using or recording in Teams, then please use the resources listed under Creating Video and Audio when it comes to media creation for lectures.
Captions and Teams recordings
All videos must have closed captions and transcripts to make them accessible. Check your videos to make sure that captions are enabled and edit those captions so they are accurate with the content in the video.