

BE SURE TO SYNC:
Once notified by IT Services, follow these one-time setup instructions for OneDrive for Business.
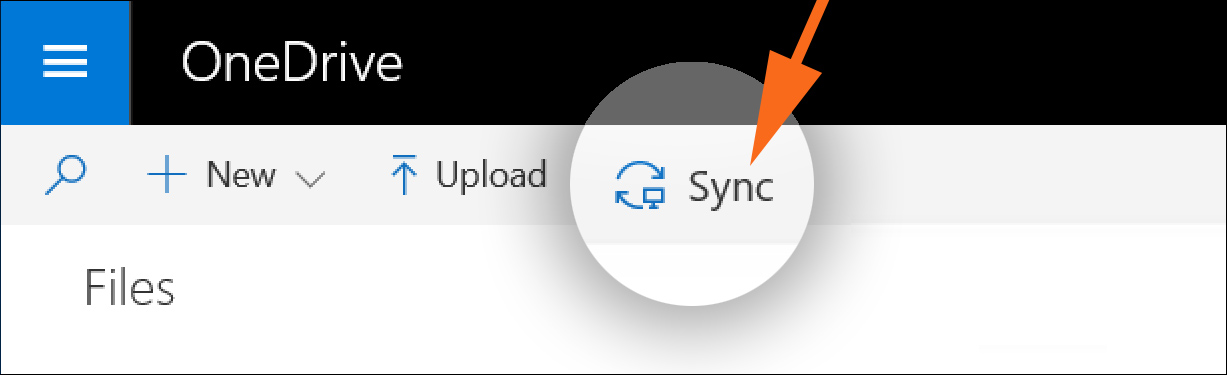
Make sure to click the Sync button in Step 4.
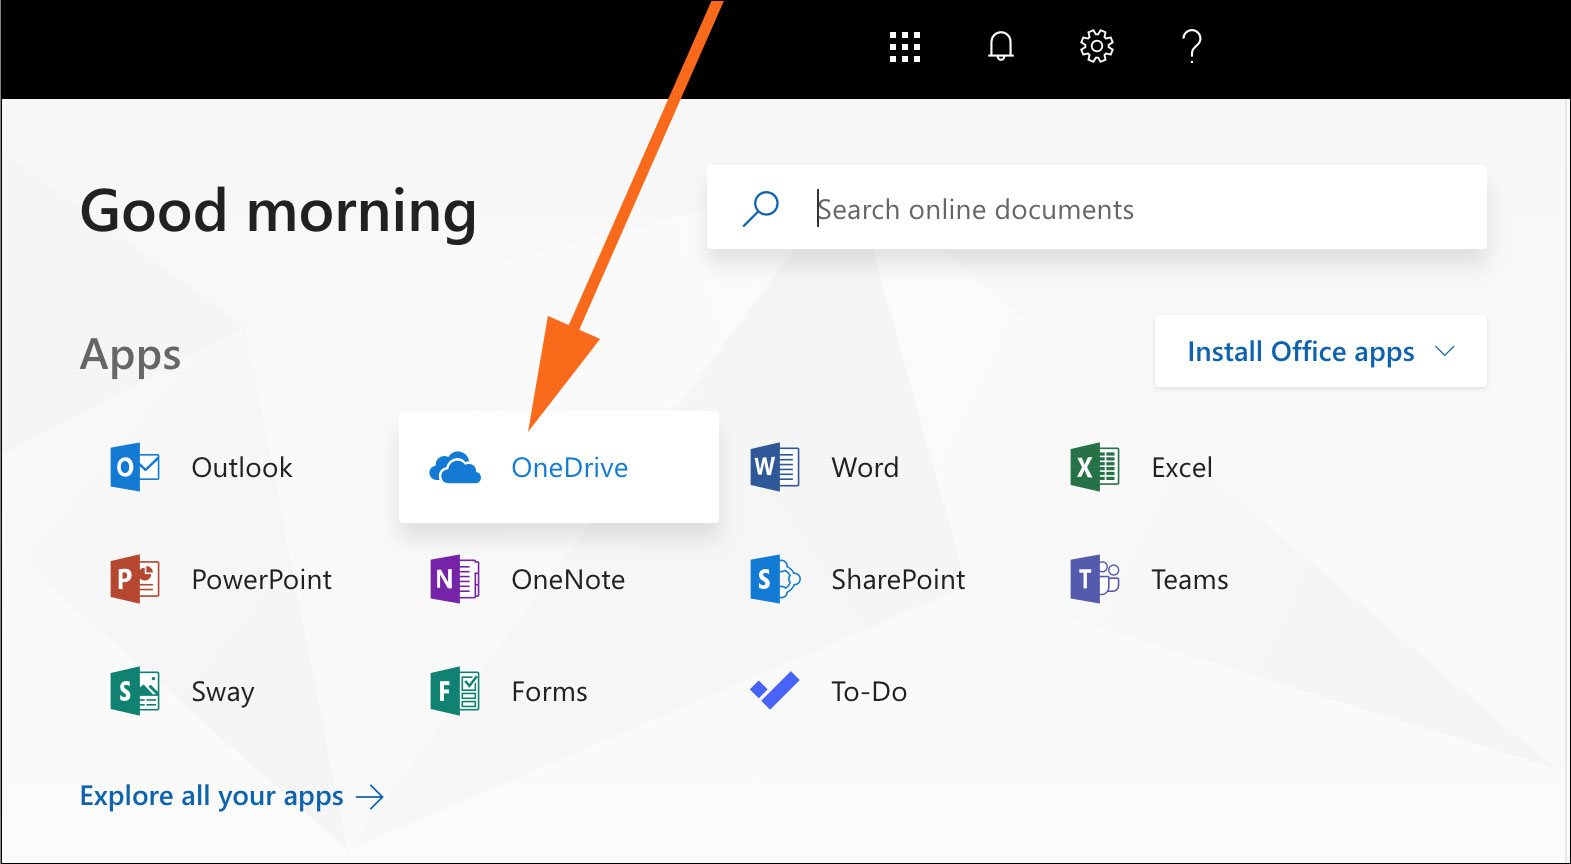
- Go to https://portal.office.com/
- Log in with your marquette.edu email address and your Marquette password.
- The Office 365 Portal appears.
Click or tap OneDrive.
- IMPORTANT: When OneDrive opens, tap or click Sync.
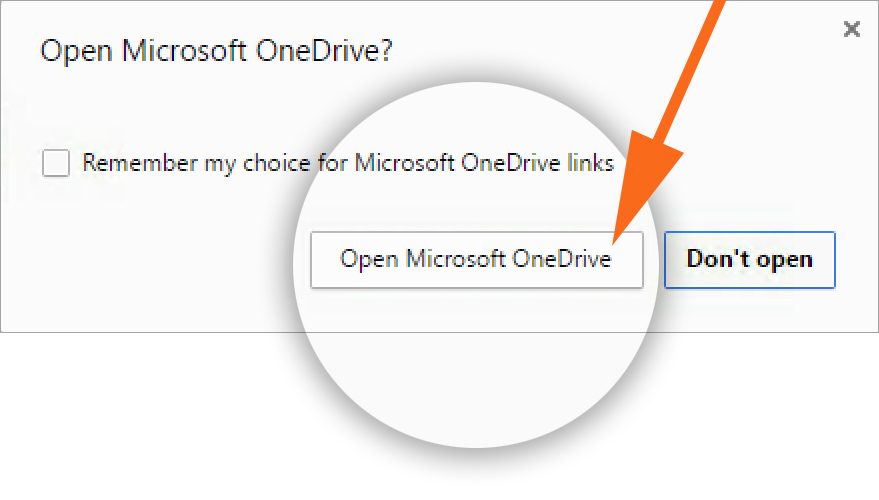
- Your browser will confirm that you want to switch to open the Microsoft OneDrive application. IMPORTANT: The look of the prompt will vary based on your browser. Google Chrome is shown below. Click or tap to confirm ("Open" or "Yes" or "Allow").
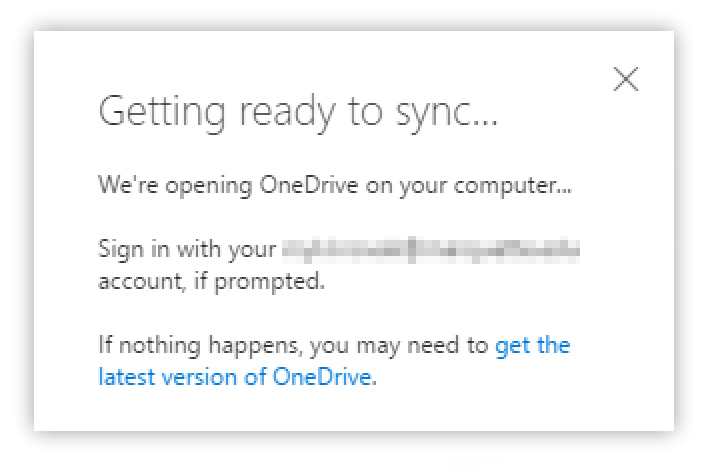
Also, your web browser will show the "Getting ready to sync..." message. If nothing happens after five minutes, click or tap the "get the latest version of OneDrive" link. At the bottom left of your screen, you will see an executable program download. Run the executable to get the latest version of OneDrive for Business.
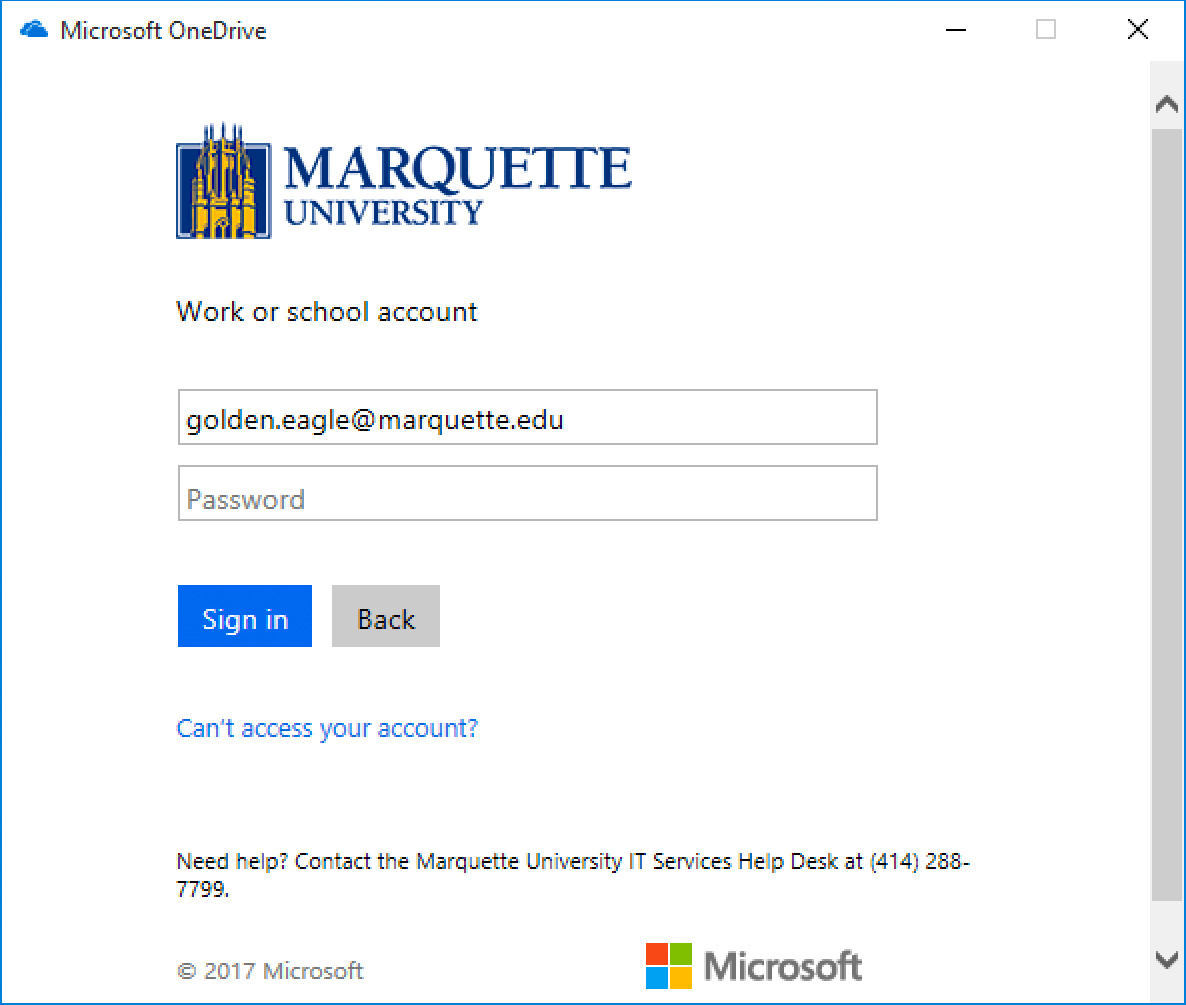
- The setup window for OneDrive appears. The Windows version is shown below. Click or tap Sign in.

- If prompted, sign in with your Marquette email address and password.
- Click or tap Next.
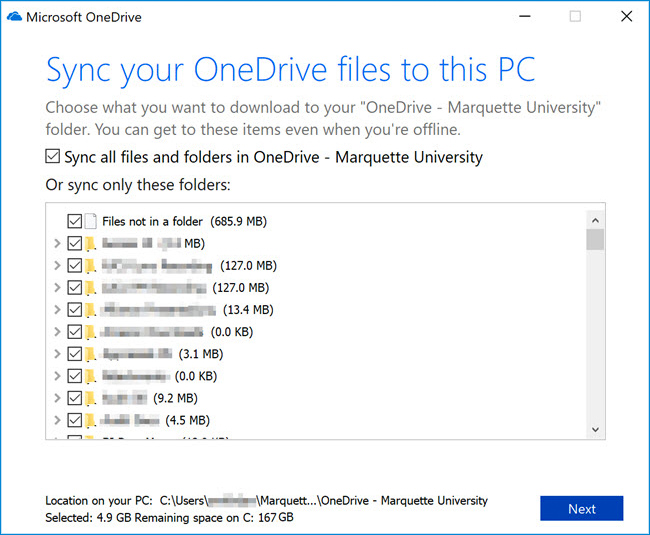
- You are asked to "Sync your OneDrive files to this PC." By default, all files and folders are selected to sync to your computer. Select the folders you want to sync.
IMPORTANT: Note the size of your selection at the bottom of the window. (4.9 GB is shown below as the size of the sync selection.) Make sure it will fit the space remaining on your computer. (167 GB is shown as remaining on the computer's "C" drive.)
Click or tap Next.
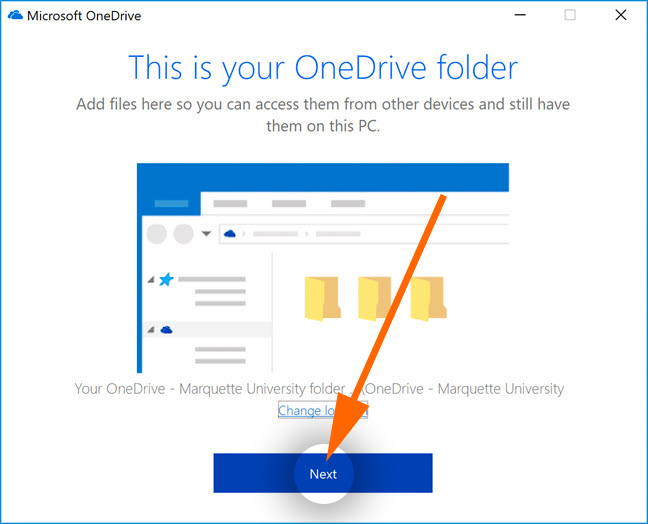
- If you see "Your OneDrive is ready for you," you have successfully started the sync. Click or tap Open my OneDrive - Marquette University folder.
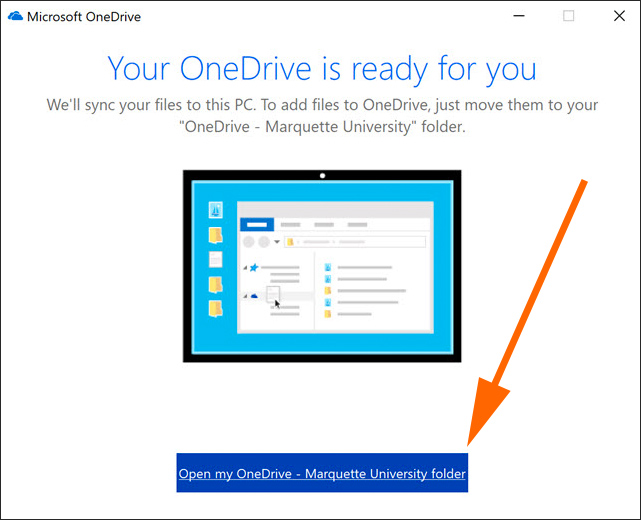
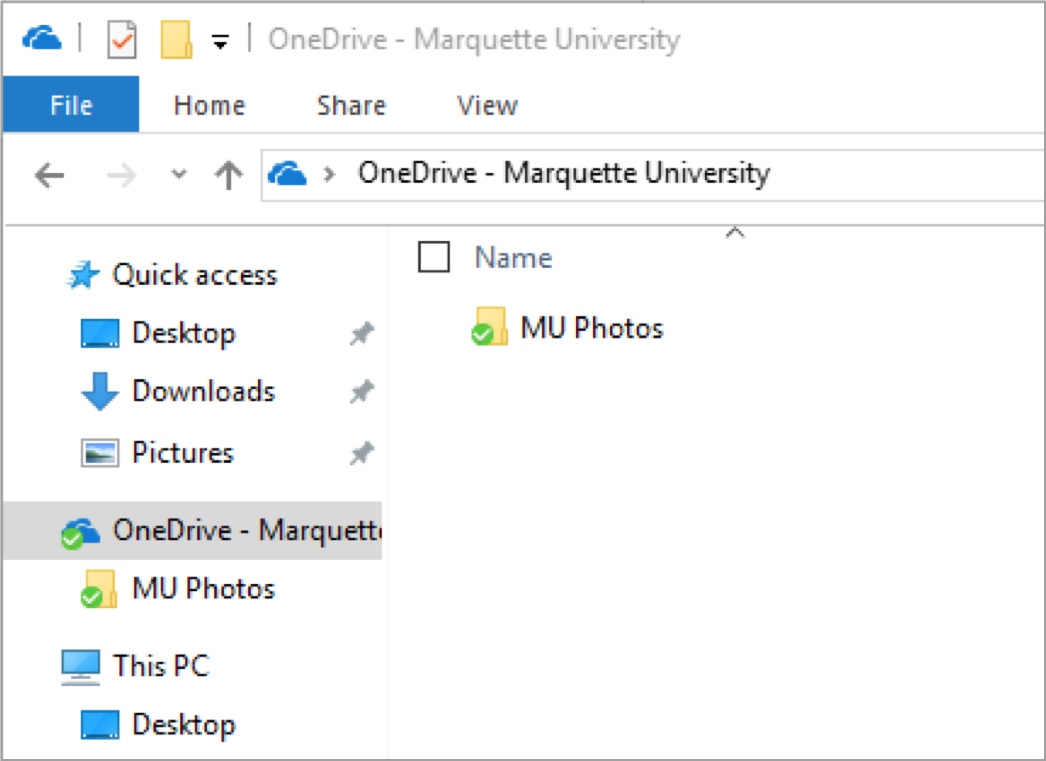
- Your "OneDrive - Marquette University" folder opens and some files and folders will eventually appear. Look for the green checkmark on the folder and file icons to know they are syncing with OneDrive.
After some time, all the folders and documents you selected will be synced to your computer. This means the documents are available on your computer even if you are not connected to the network.
- To check on the sync status of the OneDrive application in Windows...
A) Click the taskbar's up arrow on the bottom right.
B) From the pop-up menu, click the blue cloud icon once.
C) Note the status of OneDrive - Marquette University.

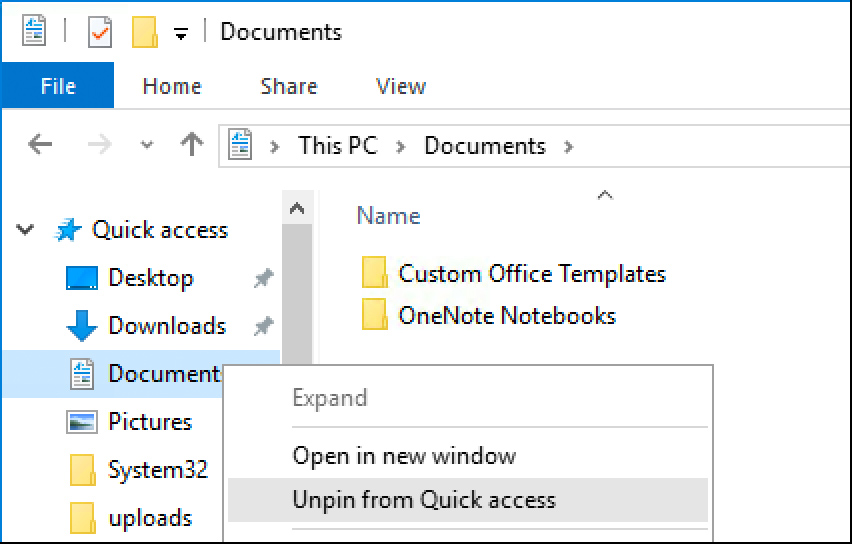
- In Windows, if you have Quick access pins to the previous campus file server, clicking those pins will prompt a network error. Right-click each problematic Quick access pin and select Unpin from Quick access.
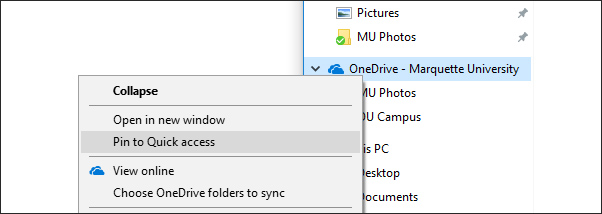
- Now select the "OneDrive - Marquette University" folder. Right-click the folder and select Pin to Quick access.
What if I'm having trouble accessing my documents?
First, know that your documents are intact and backed up. You can confirm your documents are stored by visiting https://portal.office.com/ and selecting OneDrive. In some cases, your computer may need additional setup to see your documents, and IT Services can help.
If you encounter trouble reaching your documents after the OneDrive sync, contact the IT Services TechSquad at (414) 288-7799 or https://techsquad.mu.edu/ to arrange for assistance.
