
-
- Online Course Development
- Online Program Development
- Program Guidelines
- Accessible Technology
- Center for Teaching and Learning
- Contact Us
- For faculty and staff questions about online teaching or course design, submit your questions to the Learning Technologies portal.
Walk-in Consultation Hours for Faculty and Staff
Monday-Friday 9 a.m. - 3 p.m.
Room 326 Raynor Library
For more in-depth questions and course consultations, schedule an appointment with one of our Instructional Design and D2L Specialists
PROBLEM WITH THIS WEBPAGE?Report an accessibility problem
To report another problem, please contact emily.newell@marquette.edu.
News Tool - Connecting to students
Schedule announcements (News items) to notify students of important events. Increase instructor presence by using the News tool.
Video Walkthrough
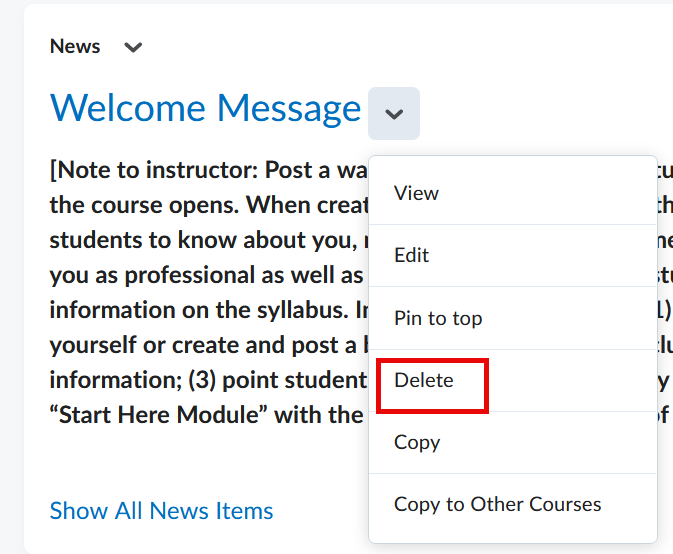
News tool menu options
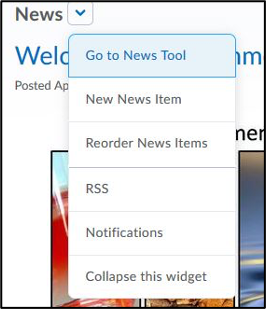 Click on the drop-down menu next to News to see all the options listed.
Go to News Tool: Provides a list of all the News Items that you’ve created. You can create, reorder, and delete News Items under this option.
New News Item: Allows you to create a News Item and edit all its settings.
Reorder News Items: Allows you to move News Items up or down the list. Students will see all the active News Items in the same order that they are in your list.
Notifications: Allows you to control how you receive notifications about activity in your course. Notifications can be received via email or SMS.
Create a News Item
Create an Announcement
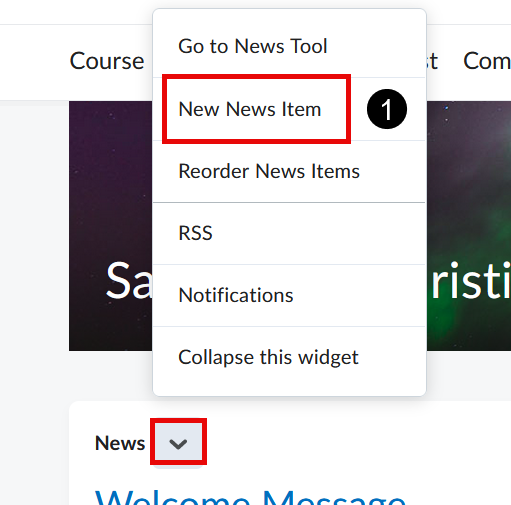
- Navigate to Course Home on the navbar and select New News Item from the News drop-down menu.
- Type a name for your News Item in the Headline box.
- Type your message in the content box. Use the rich text editor toolbar to edit the content.
- Set up the availability (start and end dates and times).
- Add a file or record audio under Attachments (optional).
- Set up release conditions (optional).
- Publish or Save as Draft.

Pin a News Item
The News tool allows you to pin your messages to the top of the page. This way students will always see the items you consider most important to view.
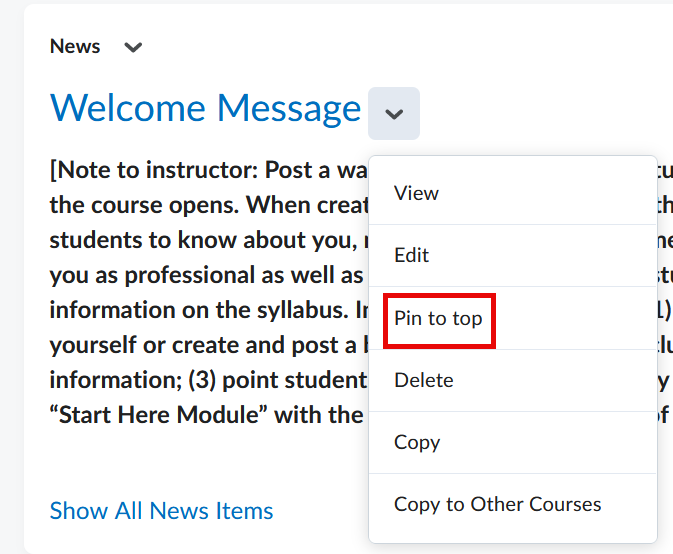
To Pin
- Navigate to Course Home (navbar).
- Select Pin to top from the drop-down menu of the News item.
To Unpin
- Navigate to Course Home (navbar).
- Select Unpin from the News item drop-down menu.
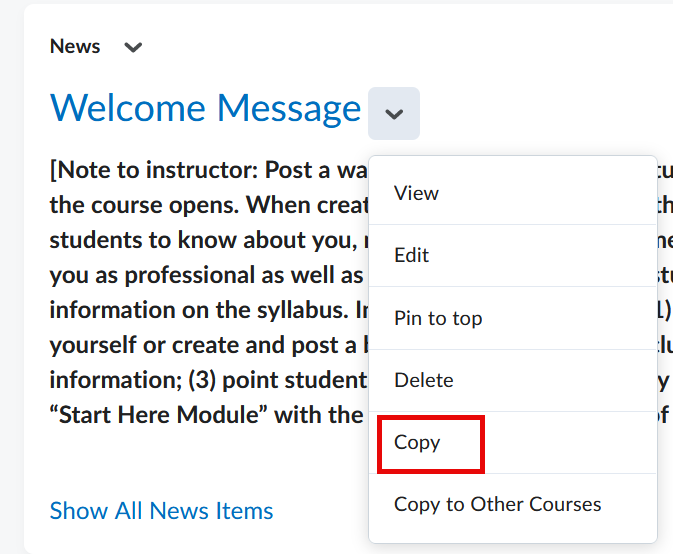
Copy a News Item
- Navigate to Course Home (navbar).
- Select Copy from the News Item drop-down menu.
- Edit the headline field by entering a title of your News item.
- Edit the News item in the Content field.
- Enter a new start date and optional end date.
- Select Publish to make the edits visible to students.
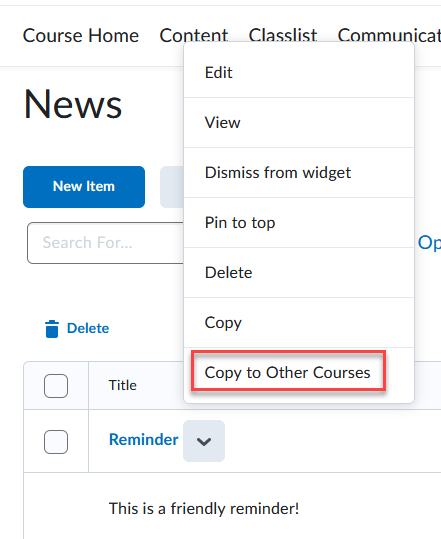
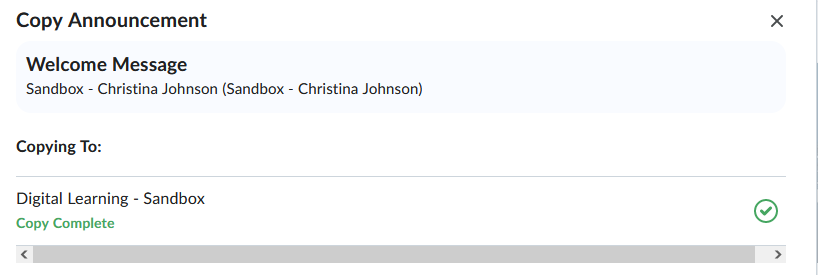
Copy to Other Courses
To quickly distribute a news item to other courses without having to use the Import/Export/Copy Components option in Edit Course, follow these instructions.
- Select the drop-down menu of the News item and select Copy to Other Courses.
- Use the search bar to type the course name and/or use the filter by semester to find the course name. Hit enter or click on the magnifying glass to trigger the search. Check the box to Publish Annoucement on Copy unless you would like the News item to copy in as Draft status.
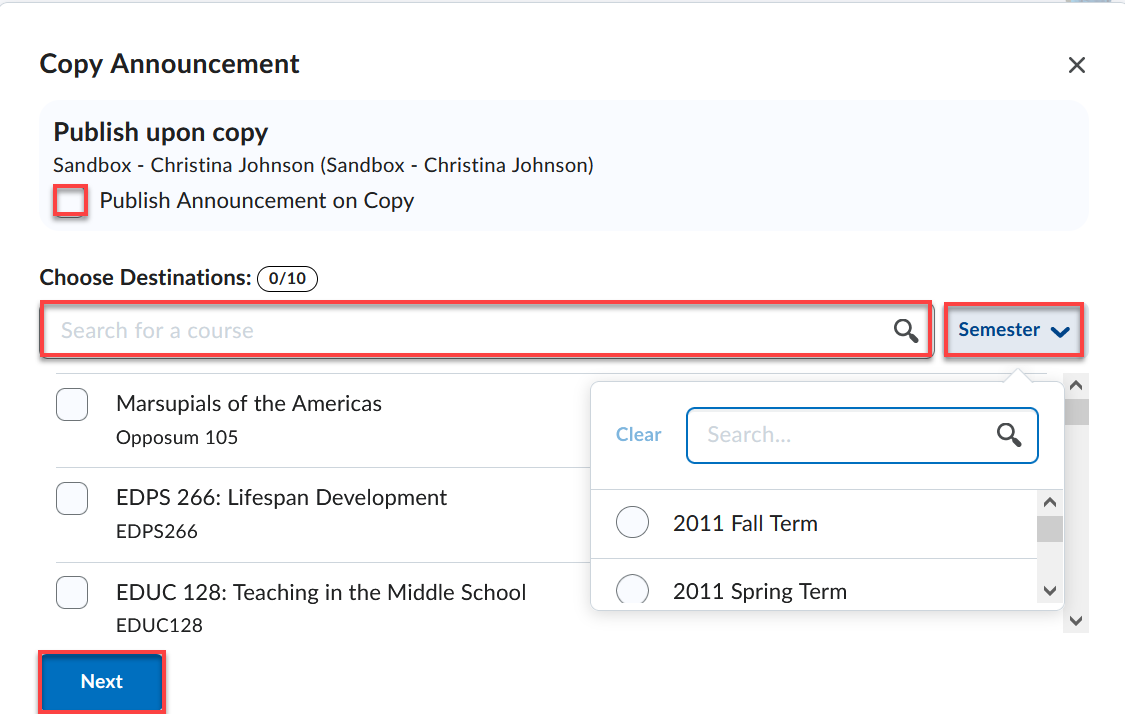
- Check the box(es) next to the name of the course(s) and click the Next button.
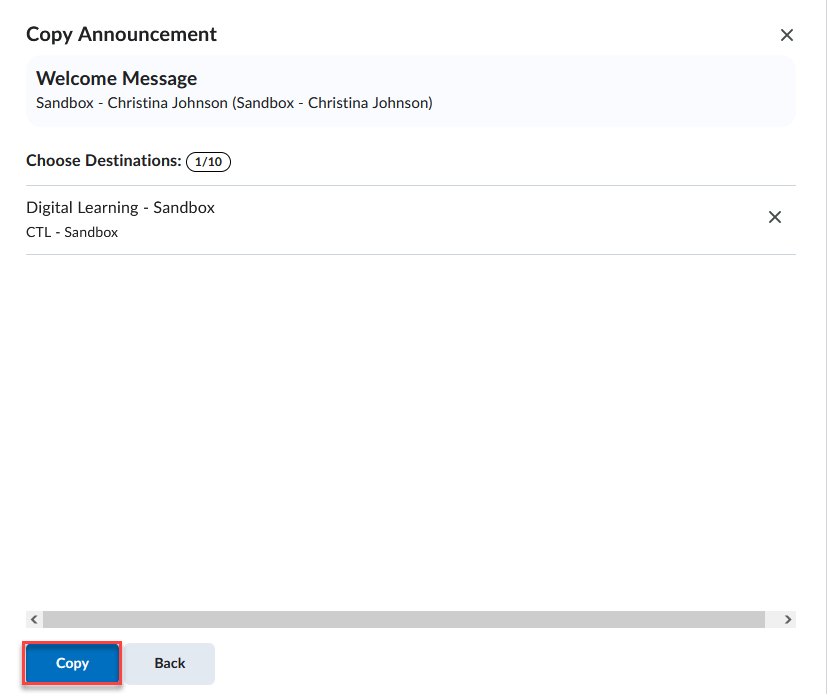
- A summary of your selections should appear. Click the Copy button.
- A green checkmark will appear next to the course the News item was copied to along with 'Copy Complete.' Click the Done button.
Publish News Item
- After the News item has been copied to the new course site, you will need to change the status from draft to publish unless you have checked the box to Publish Announcement on Copy.
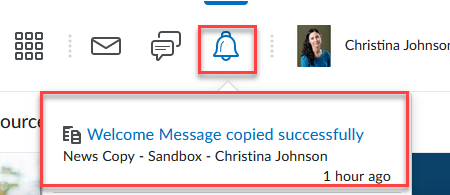
- Navigate to Course Home and select Go to News Tool from the News drop-down menu. Find the copied News item and select Edit from the drop-down menu to find the Publish button at the bottom of the page.
- An alert will appear to confirm the News item was copied successfully.
Email a Copy to Classlist
Delete a News Item
Delete an Annoucement
Select Delete from the drop-down menu next to the name of the News Item you want to delete. (If you want to reuse the announcement for next term, then enter an end date under the Edit page.)
Dismiss vs. Delete
- Click on the X next to the News item to dismiss it from Course Home page.
- Each user must dismiss their own News items from the Home page.
- The instructor can set up an end date to remove it permanently from student view or click on the Delete option from the drop-down menu.
- A student cannot delete a News item.
Common Uses and Suggestions
Best Practices and Tips
- Create a welcome message to the course. (When a student logs in to the course, this will be the first item seen.)
- Send students important messages or reminders instead of using email.
- Clarify assignment instructions.
- Summarize the week's content.
 Share content/files or link to course components by selecting Insert Quicklink.
 Use Insert Stuff to add multimedia (e.g., images, video, audio) to your message.
- Format your message using the rich text editor toolbar (Brightspace Editor).
Schedule News Items
- Schedule News items to be delivered at specific dates/times.
- Space out these announcements so students do not feel overwhelmed.
- The News items will remain hidden to students until that specific date/time.
- Publish the News Item so it does not remain hidden at the specified date/time.
- News items can be released based on completing an activity (e.g., students must submit to dropbox before viewing the announcement). Use the release condition found at the bottom of the Edit News Item page. Select Create and Attach.
- Students can dismiss News items, but they can’t delete. If you would like to delete or remove an item from student’s view, then select Go to News Tool from the drop-down list to select Edit and enter an End Date.
- Encourage students to set up their notifications to receive an email or text message regarding any new or updated News items.