

-
- Online Course Development
- Online Program Development
- Program Guidelines
- Accessible Technology
- Center for Teaching and Learning
- Contact Us
- For faculty and staff questions about online teaching or course design, submit your questions to the Learning Technologies portal.
Walk-in Consultation Hours for Faculty and Staff
Monday-Friday 9 a.m. - 3 p.m.
Room 326 Raynor Library
For more in-depth questions and course consultations, schedule an appointment with one of our Instructional Design and D2L Specialists
PROBLEM WITH THIS WEBPAGE?Report an accessibility problem
To report another problem, please contact emily.newell@marquette.edu.
D2L Attendance
The Attendance tool is used to track student attendance for activities. A percentage for attendance can be calculated based on the attendance scheme. Determine if students are complying by setting a Cause for Concern percentage. Note: The calculated attendance percentage does not integrate with the grade book.
Instructor View of Attendance
|
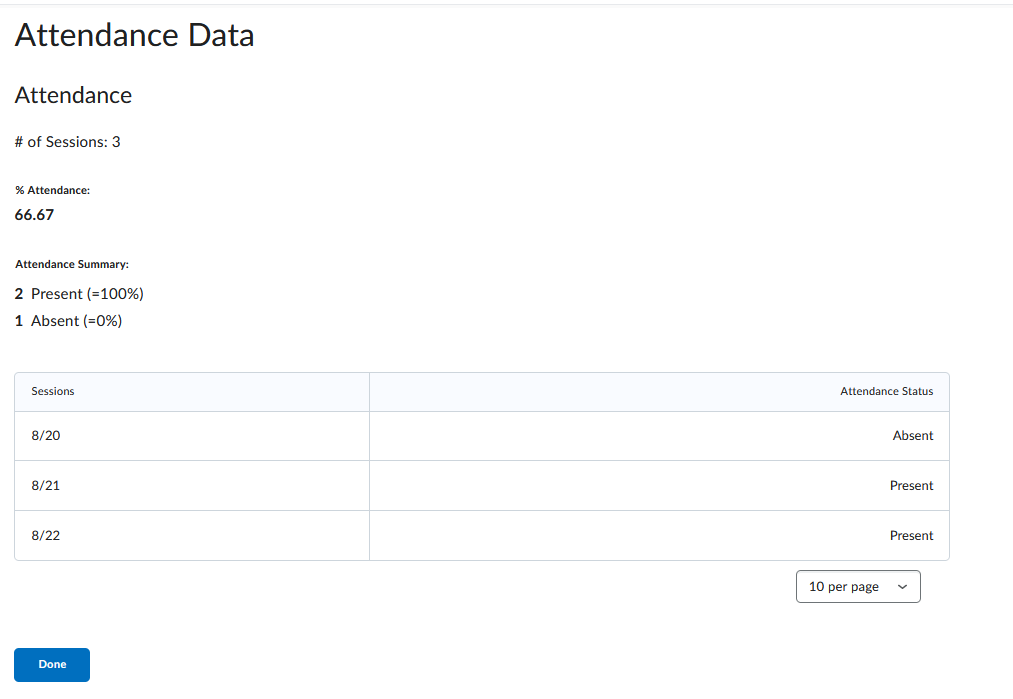
Student View of Attendance
|
Where is the attendance tool?
Click Resources on the main navigation bar and select Attendance. 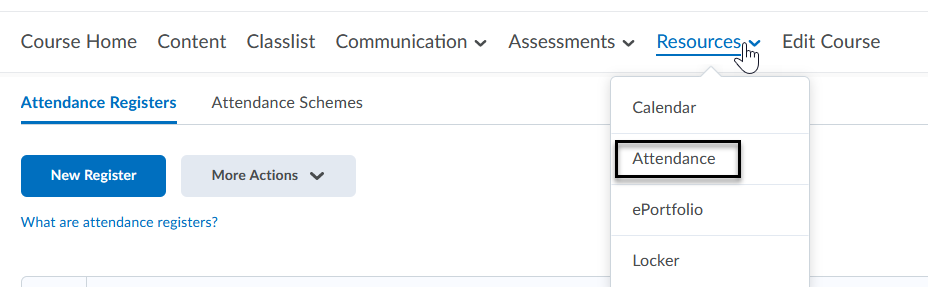
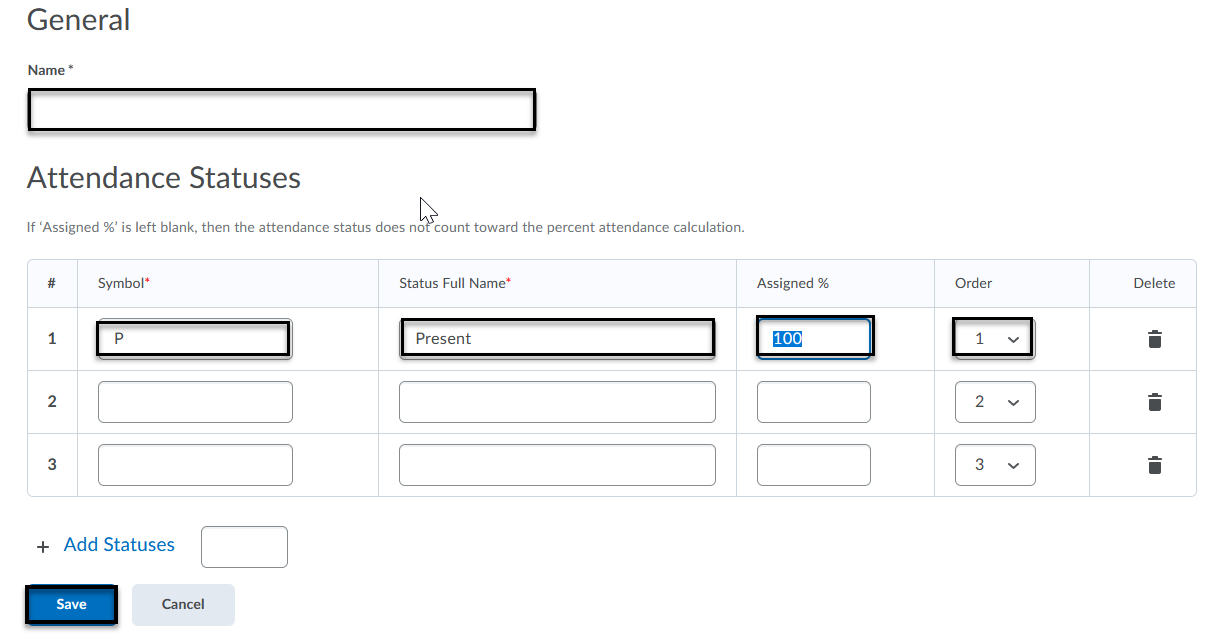
Attendance Scheme
The default scheme is set to the following:
P - Present, 100%;
A - Absent, 0%.
Consider adding the following:
L - Late, 75%;
AA - Authorized Absent, 100%.
If used for grading, the formula would be the sum of assigned percentage divided by total percentage assigned multiplied by 100.
Editing Scheme
- Select Attendance from the Resources (main navbar).
- Select Attendance Schemes tab.
- Select New Scheme
- Enter the information in the fields for Name of Scheme, Symbol and Status Full Name. The Assigned % is optional if you would like to grade for class participation. Reordering is optional.
- Click Save.
- Click Close. This will take you to the Attendance Scheme page.
- Click the Set button next to the newly created scheme. (The scheme will be listed on Course Schemes under the Attendance Scheme page.) Click Set again in the confirmation pop-up message.
Create a Register and Sessions
A register is an entry you create to track attendance for activities. Synchronous meetings is an example of an entry. The sessions are the dates the students are required to attend.
- Select Attendance from the Resources (main navbar).
- Select New Register.
- Complete the fields in Properties.
Enter the name (e.g., NURS 1001 attendance) and session name (e.g., 5/26/21) [1].
The description text box is optional [2]. Provide details of the purpose of the attendance tracking tool.
The default scheme is displayed [3]. Click the drop-down menu next to system scheme to select your preferred scheme. To customize the scheme, see the instructions under Attendance Scheme.
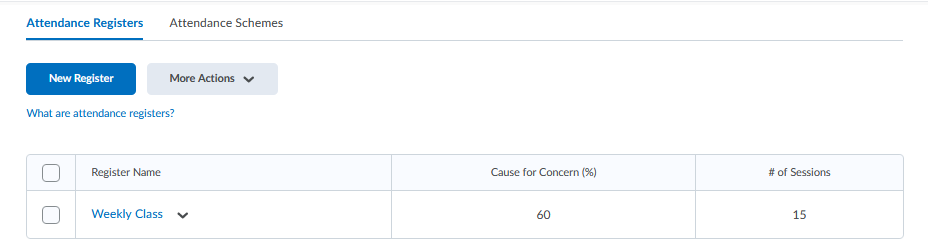
Enter a percentage in the Cause for Concern (%) field [4]. This indicates your minimum requirement for attendance. If the student does no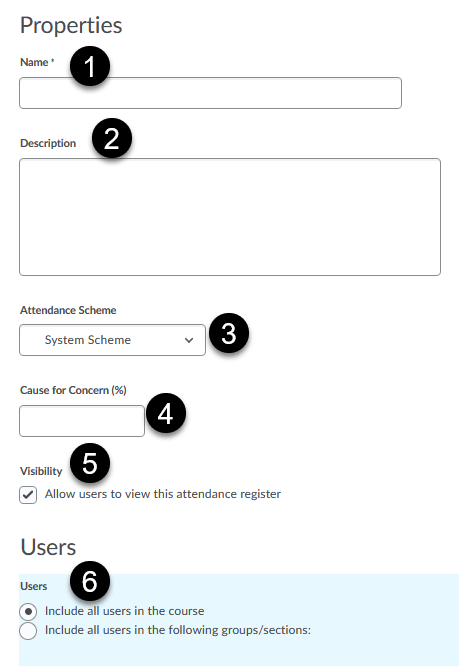 t meet this requirement, the system flags the student.
The system default is set to allow users to view the attendance register [5]. Deselect the checkbox if you prefer it hidden.
The system default is set to include all users in the course, but this setting can be changes to restrict to groups/sections [6].
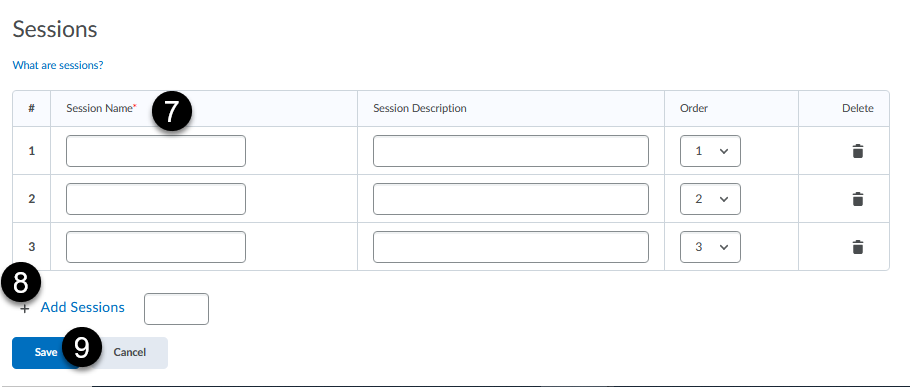
Scroll down the page to find the session area. Enter a session name [7]. Session description is optional. Reordering is possible using the drop-down menu.
Add a session by entering the number of additional sessions and clicking Add Sessions [8].
Click Save [9].
Cause for Concern percentage
The Cause for Concern helps track students that fail to meet attendance requirements. The Cause for Concern icon is displayed next to their names on the attendance data page.
- Select Attendance from the Resources (main navbar).
- Select New Register or Edit Register from the drop-down menu of the existing register.
- In the Cause of Concern field, enter the percentage that is the minimum requirement for attendance.
- Click Save.
Edit, Delete and Restore
It is possible to edit and delete schemes, registers and sessions. (If a session is added to a register, then the scheme cannot be edited.) If a register is deleted, it can be restored.
Edit
To edit a register, select Edit Register from the drop-down menu next to register name from the Attendance main page. After editing details, click Save.
To edit a session, select View Attendance Data from the drop-down menu next to register name. Click the Enter attendance data icon for the name of the session to change the attendance status by selecting the drop-down menu.
Delete and Restore
To delete a register individually, select Delete from the drop-down menu next to the register name from the Attendance main page.
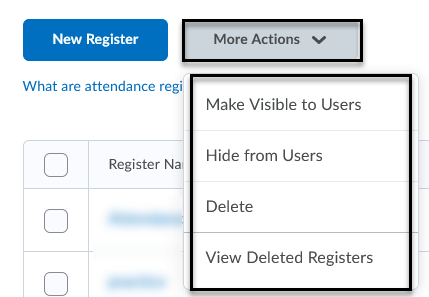
To delete a register in bulk, click More Actions from the Attendance main page and select Delete after checking the registers you would like to delete.
- To restore a deleted register and associated sessions, select View Deleted Registers from the More Actions menu.
To delete a session, select Edit Register from the drop-down menu next to register name. Scroll down the page to Sessions area and select the trash can icon to delete the session.
To delete a scheme, select the drop-down menu next to the name of the scheme.
Modify visibility of attendance registers
- Select Attendance from the Resources (main navbar).
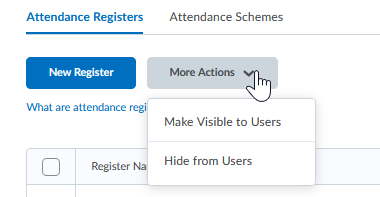
- Select Make Visible to Users or Hide from Users from the drop-down menu next to the register name.
- To bulk edit the visibility, select the checkboxes next to the registers that apply and use the More Action button at the top of the page to select either Make Visible to Users or Hide from Users.
Taking Attendance
Once the register, sessions, and scheme have been created or selected, you are ready to enter attendance data. Note: If a session is added to a register, then the scheme cannot be edited.
- Click on the register name.
- Select the icon next to the session name.
- A listing of your students will appear along with the attendance status column. To enter data, click the drop-down menu to choose the attendance status. (The items listed reflects the attendance scheme selected.) Note: To expedite the process, use the Set Status for All Users button at the top of the page to choose one choice for all (e.g., P = Present). You will be prompted to save. Then, find the students that were absent or tardy to make edits to those few students.
- Click Save.
![]()