-
- Online Course Development
- Online Program Development
- Program Guidelines
- Accessible Technology
- Center for Teaching and Learning
- Contact Us
- For faculty and staff questions about online teaching or course design, submit your questions to the Learning Technologies portal.
Walk-in Consultation Hours for Faculty and Staff
Monday-Friday 9 a.m. - 3 p.m.
Room 326 Raynor Library
For more in-depth questions and course consultations, schedule an appointment with one of our Instructional Design and D2L Specialists
PROBLEM WITH THIS WEBPAGE?Report an accessibility problem
To report another problem, please contact emily.newell@marquette.edu.
Creating Groups in D2L
Create a Group
Decide how you want to organize groups before setting them up, since this will affect how your students enroll in groups. Groups can be assigned by you, chosen by the students or automatically created. Each group can have its own discussion forum, locker, or dropbox folder. Members of groups are graded as a team.
The group will need to be created first before it can be assigned to a discussion topic or dropbox.
- Select Groups from the drop-down menu of Communication on the main navigation bar.
- On the Manage Groups page, click on New Category.
- Enter a category name (required) and a description (optional).
- Select the Enrollment Type from the dropdown menu.
Enrollment Types:
- # of Groups – No Auto Enrollments: You define the number of groups and manually add students to your groups later by using the Enroll Users page. Use when you know how many groups you want to create and which users you want in each group.
- Groups of #: You select the number of students per group, but the system automatically enrolls students.
- # of Groups: You select the total number of groups you want to be created in this category and have the system automatically enroll students.
- Self-enrollment: Allows the student to enroll in a group. The instructor will always have the ability to enroll users in case a student does not enroll or you can automate to allow the system to self-enroll past the expiration date. For courses with multiple sections, an instructor can select use Make category and section description visible to section members to provide instruction such as 'Please enroll in a group of your choice.'
- Groups of # – Self Enrollment: You define how many students you want per group and let students select their own group.
-
# of Groups – Self Enrollment: You define how many groups will be in this category and let students select their own group.
- # of Groups, Capacity of # – Self Enrollment:You define the number of groups in the category and the number of students in each group. Students select their own group.
- Groups of # – Self Enrollment: You define how many students you want per group and let students select their own group.
- Single-user, member-specific groups: You can create a private area for students to reflect on a topic through a journal type discussion. It can also be used for private conversations between the instructor and student.
Note: If you select Groups of # or # of Groups, you will need to configure these options:
-
-
- Auto-Enroll New Users: Automatically adds new students in your class to the groups.
- Randomize users in groups: Randomly places students in groups. If this option isn’t chosen, the system places students alphabetically based on the Classlist.
-
5. Select Restrict Enrollments To if a subgroup is desired for one of the existing groups or sections. No restrictions (no subgroups will be created) is the default.
6. Click Save.
Note: The Create Workspace allows the user to select the course tool you want the groups in this category to have access to: Discussion forum, Locker, or Dropbox. If you select discussion or dropbox, you will be prompted to complete an additional step to set up the forum and topic or type of submission for the dropbox folder. I suggest setting up the group directly in the discussion or dropbox tool.
Edit a Group
Once an enrollment type has been made, there is no way to edit it. You must delete and start over or use the Add Group or Enroll Users option.
Select the drop-down menu next to the category name to add a group, enroll users, or edit the category. Editing a category involves editing the group name, description and group options to auto-enroll new users, randomize users in a group or make the category and group description visible to group members.
Delete a Group
The delete option located in the drop-down menu of a group category will delete all the groups in the category along with the groups' associated dropbox folders (assignments) and discussion topics. A pop-up message will appear to confirm the permanent deletion of those dropbox folders and discussion topics. This pop-up message will also appear when group deletion is attempted.

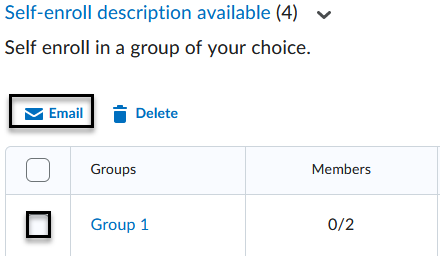
Email a Group
The email option provides a way to email the group members. Check the box next to the group you would like to email and select Email located above the groups.