-
- Online Course Development
- Online Program Development
- Program Guidelines
- Accessible Technology
- Center for Teaching and Learning
- Contact Us
- For faculty and staff questions about online teaching or course design, submit your questions to the Learning Technologies portal.
Walk-in Consultation Hours for Faculty and Staff
Monday-Friday 9 a.m. - 3 p.m.
Room 326 Raynor Library
For more in-depth questions and course consultations, schedule an appointment with one of our Instructional Design and D2L Specialists
PROBLEM WITH THIS WEBPAGE?Report an accessibility problem
To report another problem, please contact emily.newell@marquette.edu.
D2L Surveys
The Survey tool has similar features to Quizzes. Its main purpose is to take a pulse of the class and improve teaching based on student feedback. Anonymous surveys can be created, however, it cannot be reversed to allow for student identification.
Suggested questions for an end-of-term course survey:
- What aspects of this course contributed most to your learning?
- How could this course be improved to better support student learning?
- What additional feedback would you like to share about your experience in this course?
Create a Survey
- Select Surveys from the drop-down menu of Assessments (main navbar).
- The Manage Surveys tab opens by default. Select New Survey.
- The Properties tab opens by default.
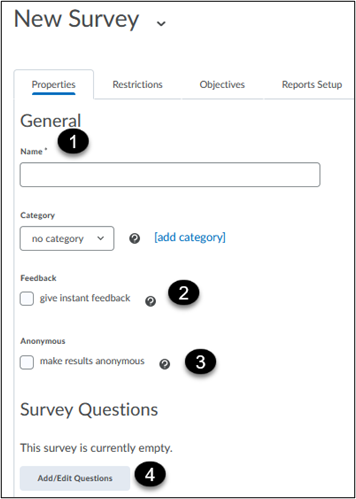
- Enter a title for the survey [1].
- Create a category if you would like to group surveys on the Manage Surveys page (optional).
- Give instant feedback by making any feedback entered for a question instantly available [2].
- Select make results anonymous (optional). Once the anonymous setting is selected, it cannot be reversed, and student identifiers will never be accessible [3].
- Enter questions using the Add/Edit Questions [4].
- Select either New or Import to create a new question or import questions from the question library. See the Quizzes Guide for details on setting up each question type. When you are done adding questions, click Done Editing Questions.
- Scroll down the page to expand the description/submission message text box (optional).
- Select on radio button.
- The description will be positioned at the top of the survey.
- Enter a submission message in the text box if you do not want the default message to read: You have successfully submitted the survey.
- Page footer is optional.
- Click Save before selecting the next tab.
- Select the Restrictions tab.
- Enter the availability start date (when survey becomes available) and end date (survey is no longer available).
- Select the attempt allowed from the drop-down list, which is either unlimited, single attempt that is editable, and limited (prompts you to enter number of attempts).
- If there are students who require a different start and end date, then add Special Access.
- Use the default setting which is to Allow selected users special access to see this survey. (The second option to allow only user(s) with special access to the survey serves to only include the user selected and hides it from the rest of the class.)
- Click Add Users to Special Access to complete the page with the new dates and click Add Users to Special Access [3].
- Click Save before selecting the next tab.
- Select the Reports Setup tab,
- Click Add Report.
- Enter a title for the report.
- The default summary report will display aggregate data and show text responses.
- Aggregate data shows Multiple Choice, True/False, Likert, Multi-Select, Ordering and Matching type questions.
- The text responses will show responses for Written Response, Short Answer, Multi-Short Answer, and Fill-in-the-Blanks.
- Select either to release the report immediately (default setting) or select a future date).
- Select who will receive access to the generated survey report. Those individual(s) selected will then be able to click the link to generate a report once the surveys are completed and results are collected.
- Click Save.
- Return to the Manage Surveys page, and select Preview from the survey's drop-down menu to ensure the survey meets your expectations.
- The student view will confirm if the anonymous setting is enabled.
- Students should receive a confirmation if their survey was successfully submitted.
- Select Make Visible to Users to allow students to take the survey.
Invite Participants
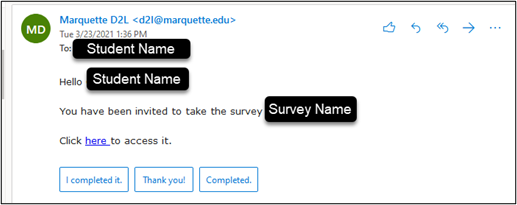
- In the Properties tab of the Edit Survey page, scroll to the bottom of the page to click Invite Participants. D2L will send an email message to students to take the survey.
- If all students are invited, select the checkbox next to the Student header to select all students in the list.
- Select Submit.
Generate a Survey Report
- In Manage Surveys page, select Reports from the survey's drop-down menu.
- Click the name of the survey (hyperlink).
- Leave the dates open if you would like to capture all attempts completed or choose specific dates for when the attempts were completed.
- Choose the type of preferred generated report – CSV, Excel or HTML.
- Save the file in your preferred location.
- Click Done.
Edit a Survey
- Under Assessments (main navbar), select Surveys.
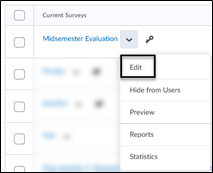
- Select Edit from the drop-down menu.
- Once edits are complete, select Save and Close.
Review Survey Attempts
- Under Assessments (main navbar), select Surveys.
- Select Statistics from the drop-down menu.
- If you had made the survey anonymous, only the Completion Summary will appear. Otherwise, click on the survey attempt link for each student to view student responses.
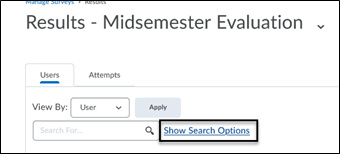
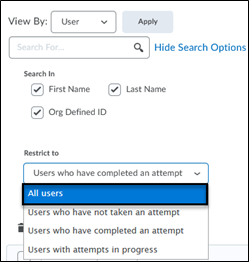
- To filter results, use the Restrict to drop-down menu found under the Show Search Options link. For example, select All Users and click the magnifying glass to initiate the search.