
-
- Online Course Development
- Online Program Development
- Program Guidelines
- Accessible Technology
- Center for Teaching and Learning
- Contact Us
- For faculty and staff questions about online teaching or course design, submit your questions to the Learning Technologies portal.
Walk-in Consultation Hours for Faculty and Staff
Monday-Friday 9 a.m. - 3 p.m.
Room 326 Raynor Library
For more in-depth questions and course consultations, schedule an appointment with one of our Instructional Design and D2L Specialists
PROBLEM WITH THIS WEBPAGE?Report an accessibility problem
To report another problem, please contact emily.newell@marquette.edu.
D2L video Note
This tool gives instructors and students a simple way to record video or audio using a computer’s webcam or a microphone and instantly publishes it in your D2L course. It also offers the option to upload a video file created with a smartphone or other video capture device.
Starting with Video Note
Video Note’s primary purpose is to help instructors establish a strong presence in their courses and give students an opportunity to respond to discussions, assignments or quiz questions in a different way. Video Notes are intended to be brief. It's important to remember that Video Notes should not be utilized for recording full lectures; instead, Microsoft Teams is recommended. Please remember it's not possible to capture screen activity; only webcam recordings are supported. Video Notes can be reused, so it is recommended to title the recordings.
Finding Video Note
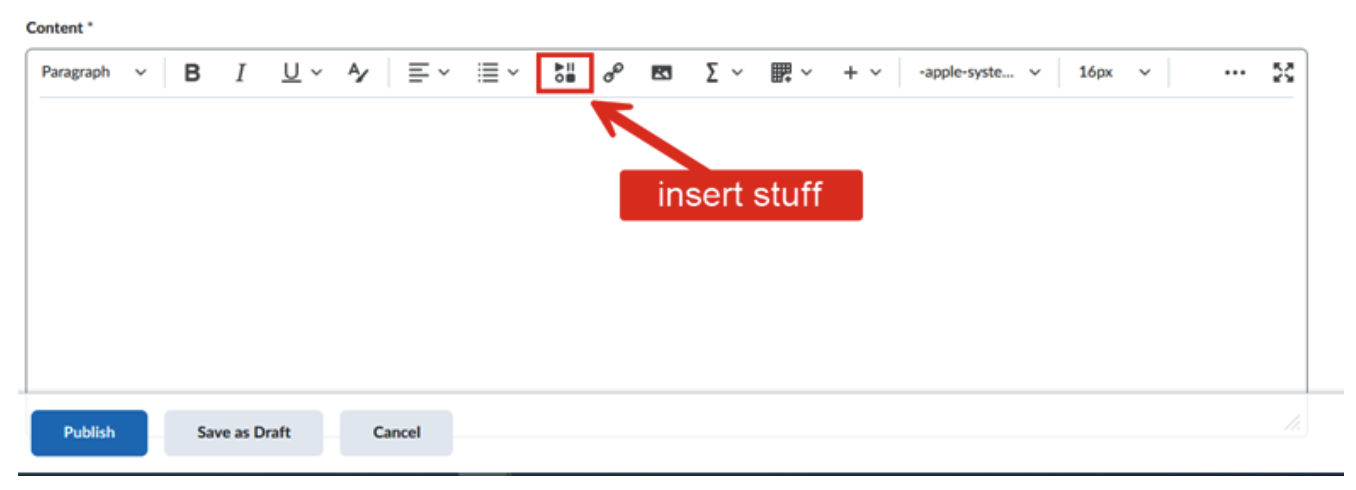
- Select Insert Stuff icon from the Brightspace Editor toolbar.
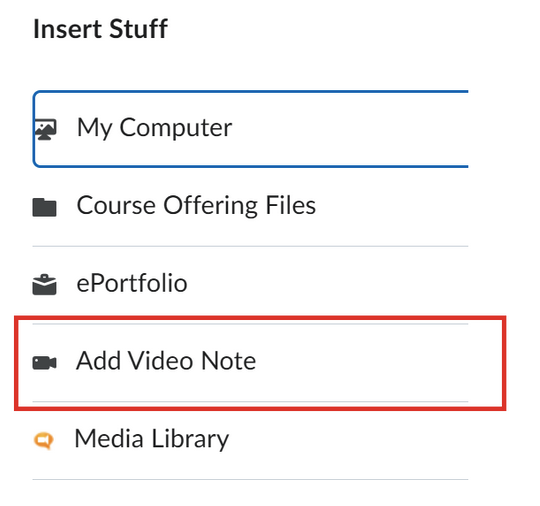
- Select Add Video Note.
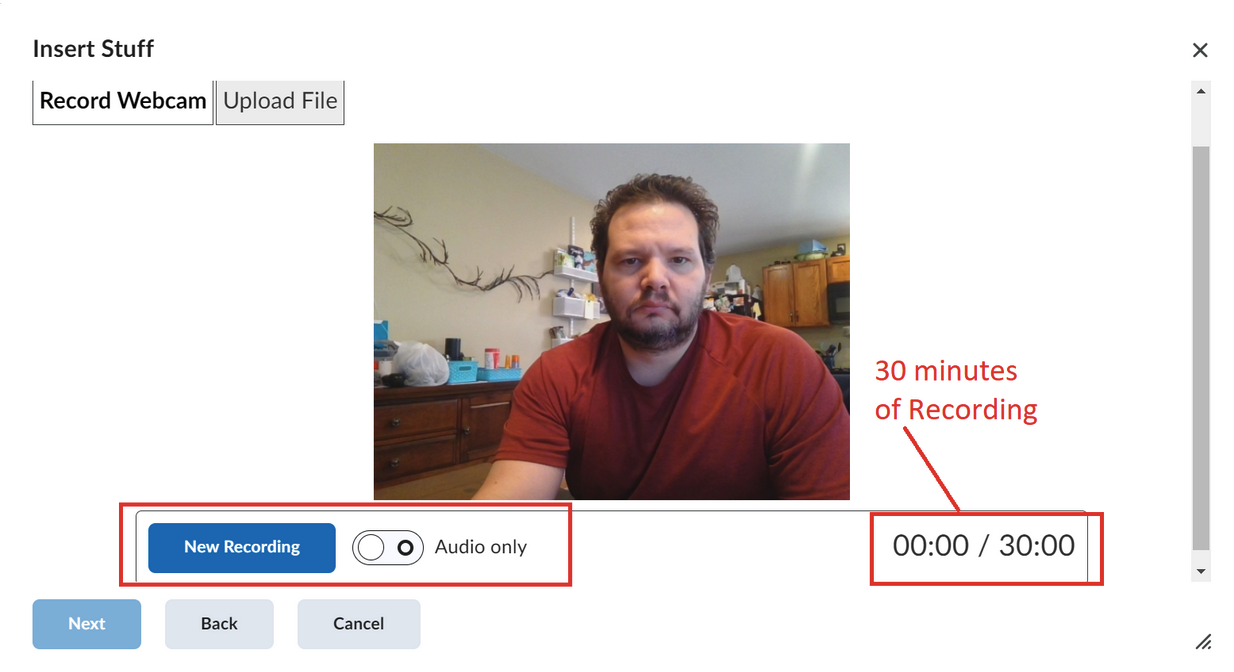
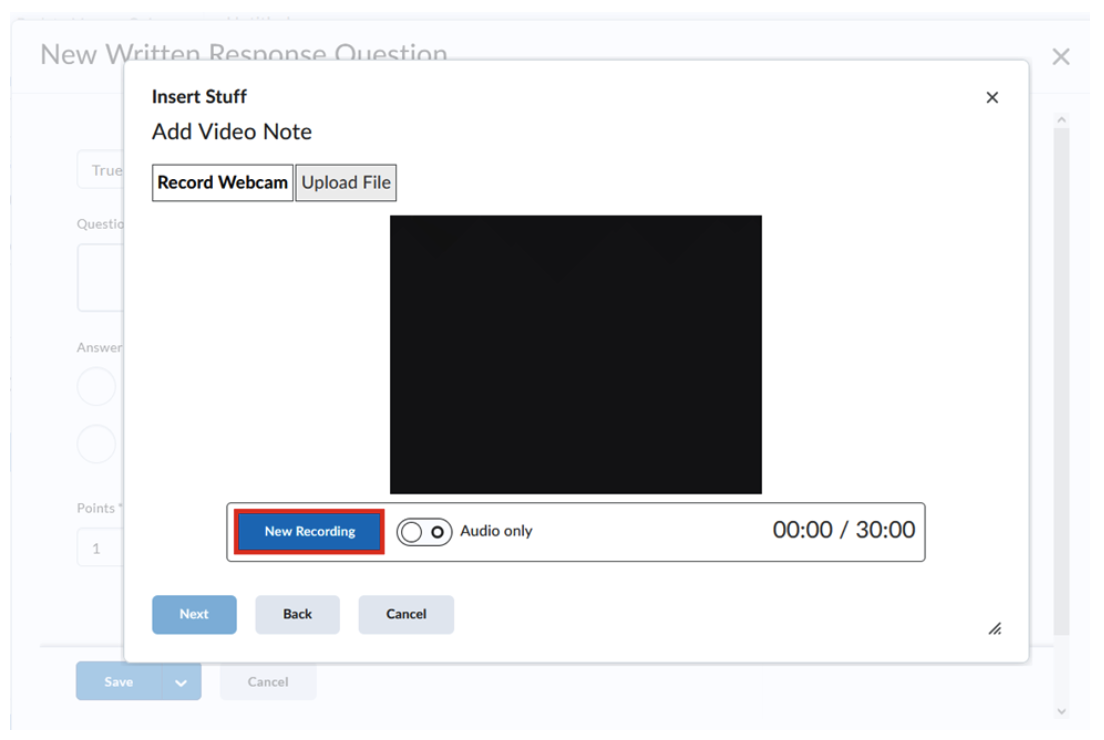
- Select the type of recording, video or just audio, then press New Recording.
- When you are done with your recording press next.
- Fill in the recording title.
- Always select a language and check the box to automatically generate captions. Doing this makes these recording accessible.

Add Video Note to a News Item
- Navigate to Course Home and select New News Item from the News dropdown menu.
- Select Insert Stuff icon from the Brightspace Editor toolbar.
- Select Add Video Note.
- A pop-up message should appear. Allow camera and microphone to be used.
- Select New Recording. There is a 30-minute time limit. (Note: There is a toggle to Audio only available.)
- Select Stop Recording to end the recording.
- Complete the Title, Description, and Audio Language details. This step is important to meet accessibility requirements. The title should be descriptive enough that it will be easy to search and reuse for a later date. Select a language and check the box to automatically generate captions.
- Select Next.
- Video will load and provide a preview.
- Select the Insert button.
- Select Publish to make the News item visible.
Add Video Note to Dropbox submission.
- Navigate to Assessments (navbar) > Dropbox.
- Select View Submissions.
- Click on the student’s name or submission.
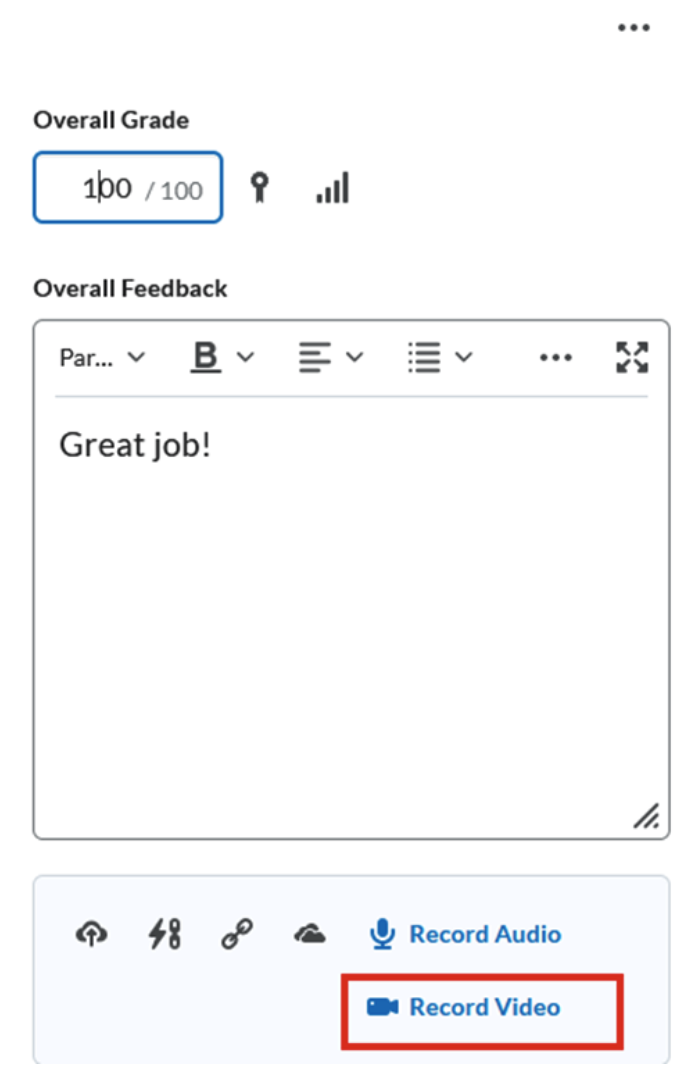
- On the right-hand side, below the Overall Feedback text box, select Record Video.
- Select New Recording. There is a 30-minute time limit.
- Select Stop Recording to end the recording.
- Select the Add button.
- Complete the Title, Description, and Audio Language details. This step is important to meet accessibility requirements. The title should be descriptive enough that it will be easy to search and reuse for a later date. Select a language and check the box to automatically generate captions.
- Select the Add button.
- Select Publish or Save Draft (to publish all at the end of grading all submissions).
Add Video Note to a Quiz
- Navigate to Assessments (navbar) > Quizzes.
- Select New Quiz button.
- Add a title to the quiz.
- Add a question by either importing from Question Library or use Create New button to add a question directly to the quiz.
- Click once in the question text area to display the editor toolbar.
- Select Insert Stuff icon from the toolbar.
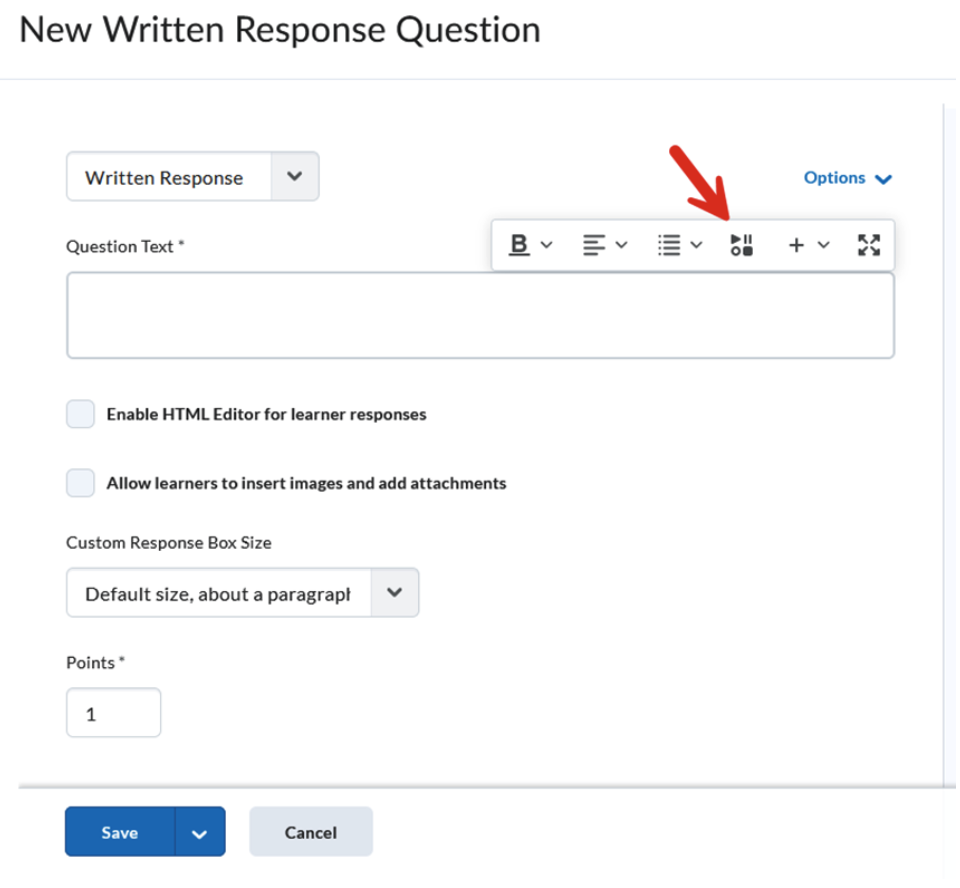
- Select Add Video Note.
- Select New Recording. There is a 30-minute time limit. (Note: There is a toggle to Audio only available.)
- Complete the Title, Description, and Audio Language details. This step is important to meet accessibility requirements. The title should be descriptive enough that it will be easy to search and reuse for a later date. Select a language and check the box to automatically generate captions.
- Select Next.
- Video will load and provide a preview.
- Select the Insert button.
- Select Save.
- Select Save and Close.
Add Video Note to Discussion Topic
- Navigate to Communication (navbar) > Discussions.
- Select New Topic from the New button dropdown menu.
- Add a topic title.
- Choose a forum or create forum.
- Select Insert Stuff icon from the toolbar of the Description text box.
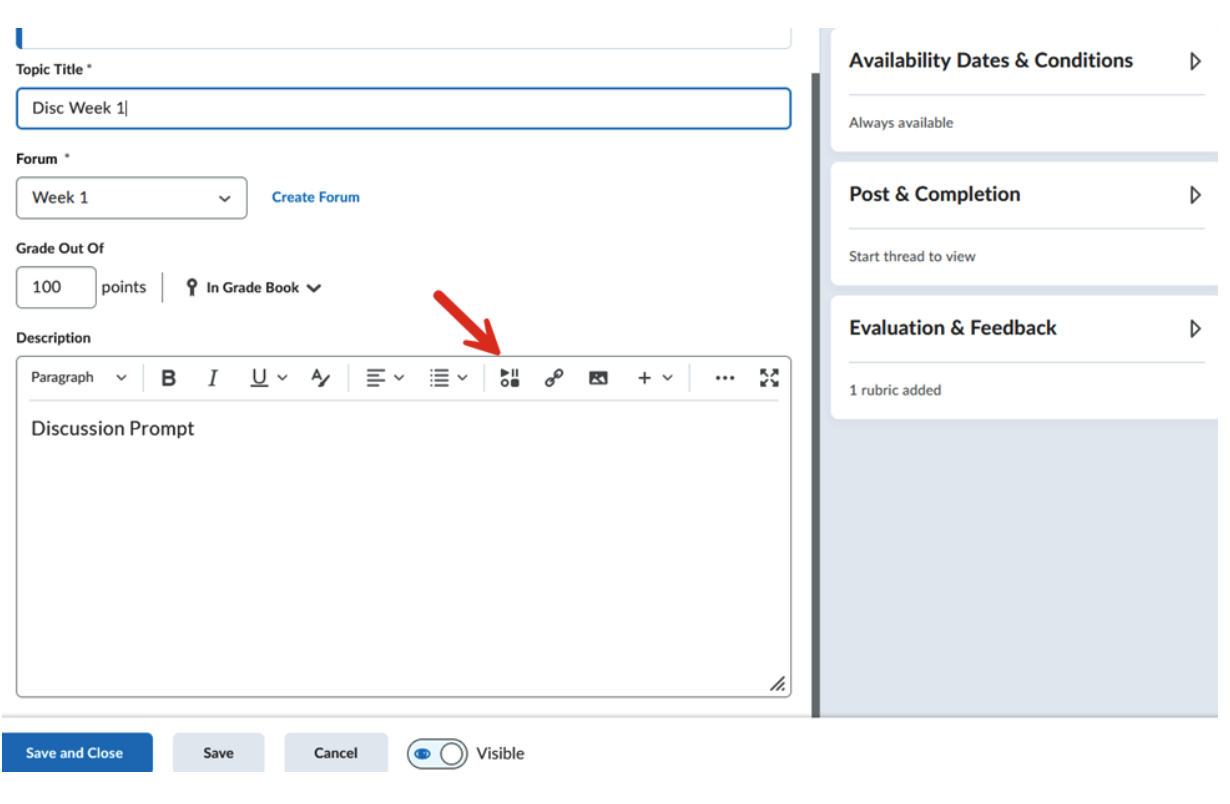
- Select Add Video Note.
- Select New Recording. There is a 30-minute time limit. (Note: There is a toggle to Audio only available.)
- Complete the Title, Description, and Audio Language details. This step is important to meet accessibility requirements. The title should be descriptive enough that it will be easy to search and reuse for a later date. Select a language and check the box to automatically generate captions.
- Select Next.
- Video will load and provide a preview.
- Select the Insert button.
- Click Save and Close.
Add Video Note to Grades
- Navigate to Assessments > Grades > Enter Grades.
- Choose a grade item to select Enter Grades from the dropdown menu.
- On the right-hand side, select the pencil to enter comments in the feedback column.
- Click the plus sign on the editor toolbar to select Insert Stuff from the dropdown menu.
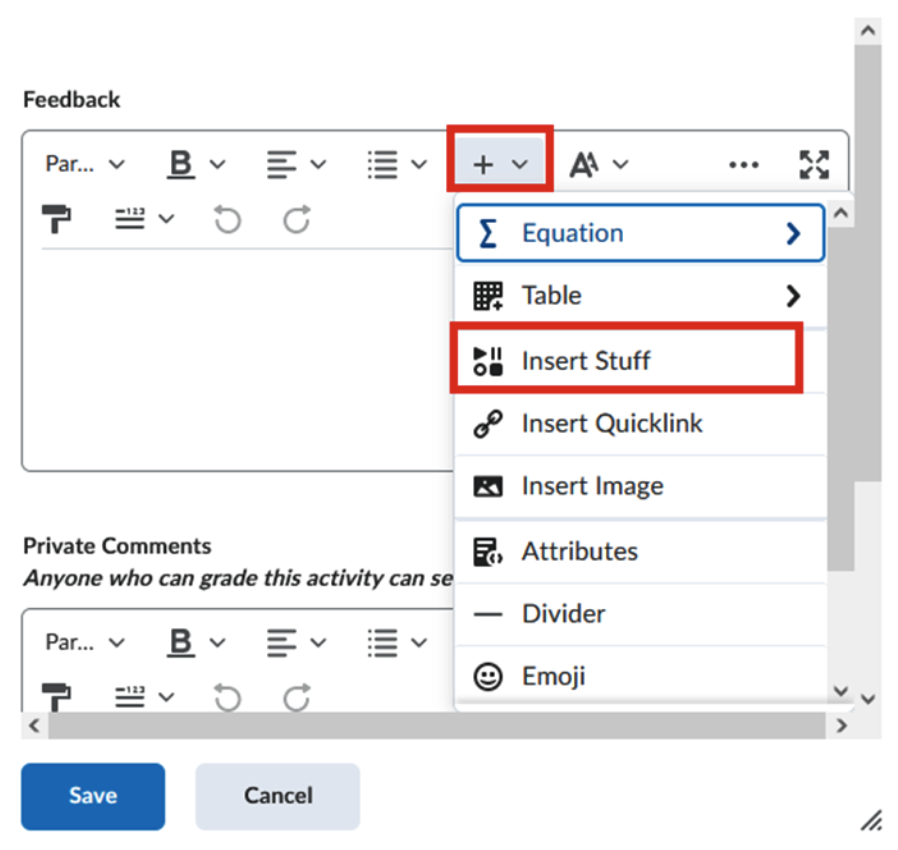
- Select Add Video Note.
- Select New Recording. There is a 30-minute time limit. (Note: There is a toggle to Audio only available.)
- Complete the Title, Description, and Audio Language details. This step is important to meet accessibility requirements. The title should be descriptive enough that it will be easy to search and reuse for a later date. Select a language and check the box to automatically generate captions.
- Select Next.
- Video will load and provide a preview.
- Select the Insert button.
- Select Save.
- Select Save and Close.
Editing Video Notes