-
- Online Course Development
- Online Program Development
- Program Guidelines
- Accessible Technology
- Center for Teaching and Learning
- Contact Us
- For faculty and staff questions about online teaching or course design, submit your questions to the Learning Technologies portal.
Walk-in Consultation Hours for Faculty and Staff
Monday-Friday 9 a.m. - 3 p.m.
Room 326 Raynor Library
For more in-depth questions and course consultations, schedule an appointment with one of our Instructional Design and D2L Specialists
PROBLEM WITH THIS WEBPAGE?Report an accessibility problem
To report another problem, please contact emily.newell@marquette.edu.
Intelligent Agents
An Intelligent Agent is a handy tool that sends personalized emails to students for you. It keeps them updated, offers recommendations, gives feedback, and provides support regarding course activities, helping to enhance communication and engagement within the learning environment.
Enhance Communication
Case Use Examples:
- Remind students who haven't logged into the course yet.
- Notify students with grades below an acceptable level.
- Prompt students who haven't submitted assignments to the Dropbox.
- Remind students who haven't completed a quiz.
- Encourage students who haven't participated in a discussion board.
- Confirm group enrollment in a self-enrolled group.
Key Considerations
- Criteria: The Intelligent Agent operates based on the conditions you define to trigger the email. These conditions may include course activity, release conditions, or login activity.
- Content: Consider the content of the email the agent sends to students once its criteria are met.
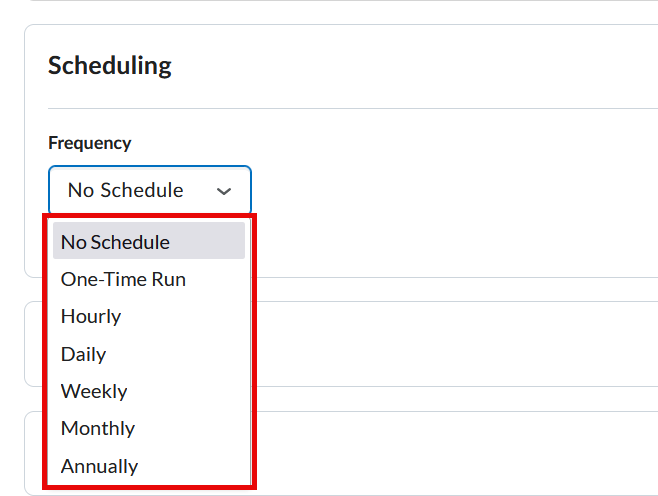
- Run time: If you do not schedule the agent, then you must trigger manually by selecting ‘Run Now’ from the dropdown menu of the agent found on the Agent List page. Be sure to select a start and end time. The run time can vary to:
- No schedule
- One-Time Run
- Hourly
- Daily
- Weekly
- Monthly
- Annually
Best Practices
- Customize the reply settings before creating an intelligent agent.
- Employ a clear naming convention that succinctly describes the purpose of each agent in its title.
- Assess whether the agent requires multiple runs and select the most appropriate run time to fulfill its objectives effectively.
- Personalize emails using replacement strings. Refer to the available list for suitable options.
- Utilize the description text box to provide helpful reminders or notes regarding adjustments needed for the agent.
- Maintain consideration for students by avoiding excessive email notifications generated by intelligent agents, ensuring a balanced and non-intrusive communication approach.
Limitations
- Intelligent agents are not powered by artificial intelligence.
- Intelligent agents cannot omit special access students.
- It is best not to reuse an agent that may be best suited for a one-time run, and action is taken only the first time the agent's criteria are satisfied.
Customize Reply Settings
To customize the reply address for automated messages, follow these steps:
- Go to Edit Course on the course navbar and choose Intelligent Agents under the Communication section.
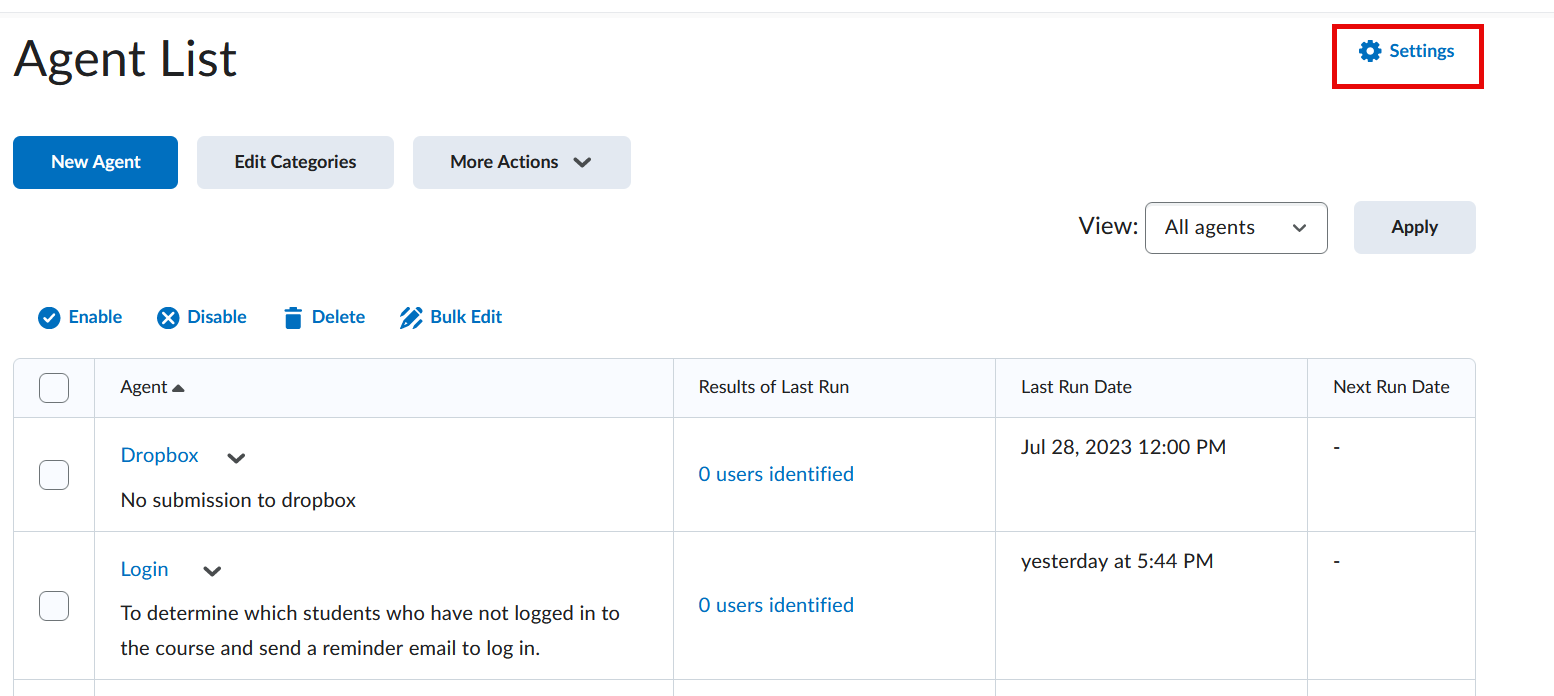
- Click on the gear icon for Settings located on the right-hand side of the page.
- Select the option to 'Set custom values for this course.'
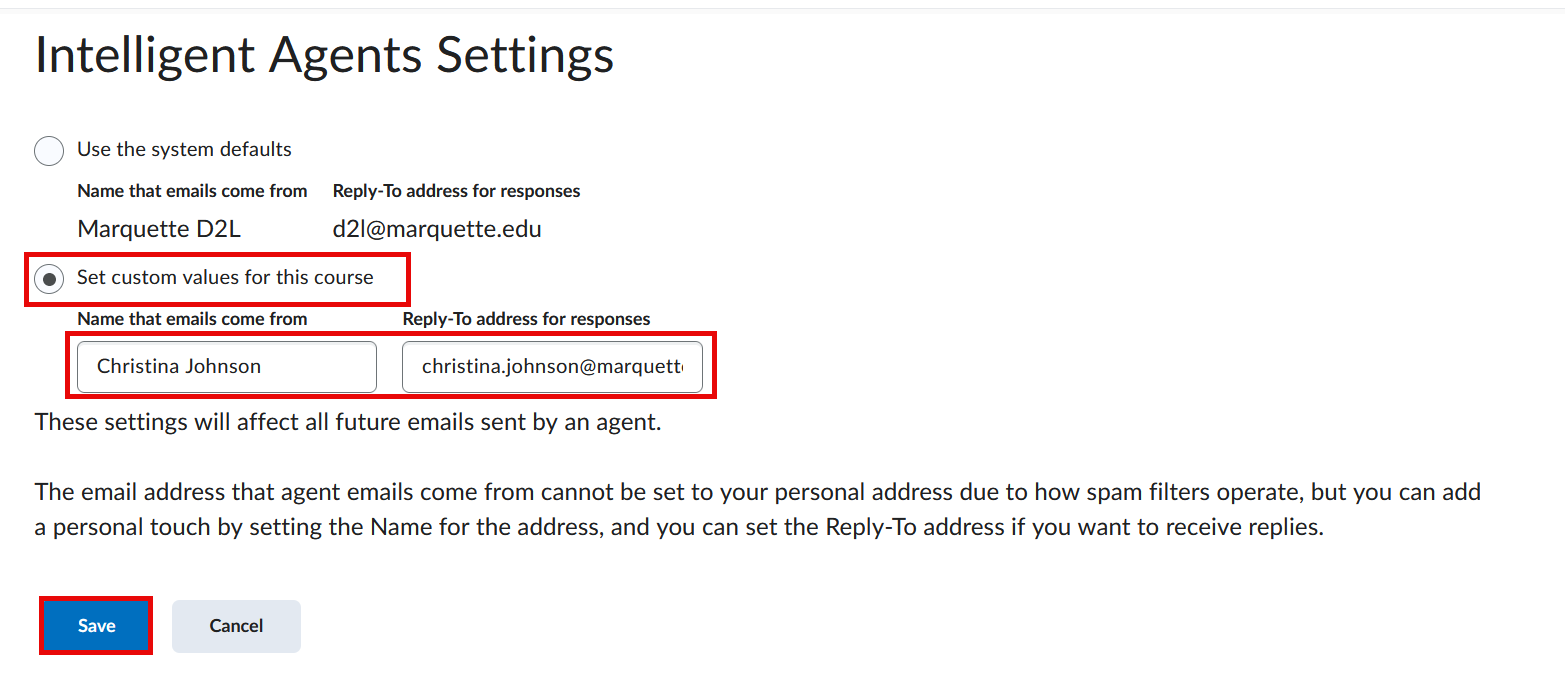
- Enter your name in the 'Name that emails come from' field.
- Enter your email address in the 'Reply-To address for responses' field.
- Save your changes by clicking the Save button.
After completing these steps, if a student replies to your automated message, the email will be directed to you instead of the default sender (Marquette D2L d2l@marquette.edu). You will also receive a copy of the sent automated email with the reply address showing your name followed by d2l@marquette.edu
Create a New Intelligent Agent
- Navigate to Edit Course on the course navbar and choose Intelligent Agents under the Communication section.
- On the Agent List page, select New Agent.
- Enter a name for the agent.
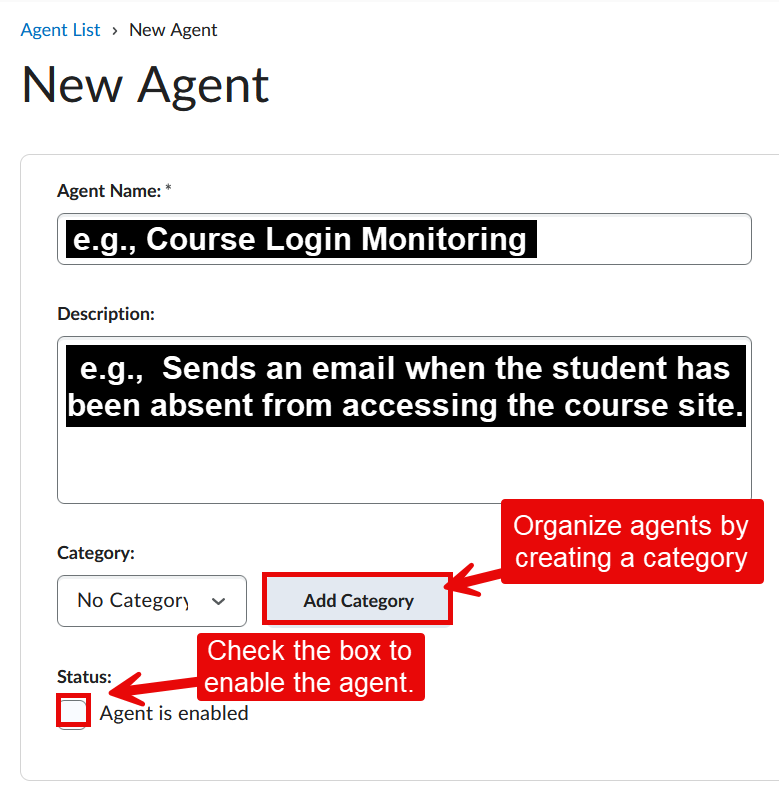
- Enter a description of the agent.
- Assign a category if you would like to organize your agents. Note: Create your category first by selecting the Add Category button.
- Enable the agent by selecting the check box.
- Select the frequency of the agent from the Scheduling section.
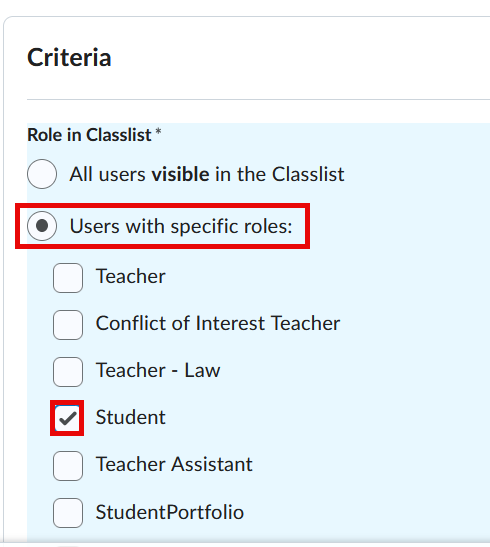
- Select who the agent will affect by selecting the role in the Classlist from the Criteria section.
- Select the Criteria (e.g., Login Activity, Course Activity, or Release Condition).

- Choose how often you would like the agent to repeat. For assistance in making this decision, click ‘What Action Repetition setting should I use?’
- Check the box to Send an email when the criteria are satisfied. Create the email.
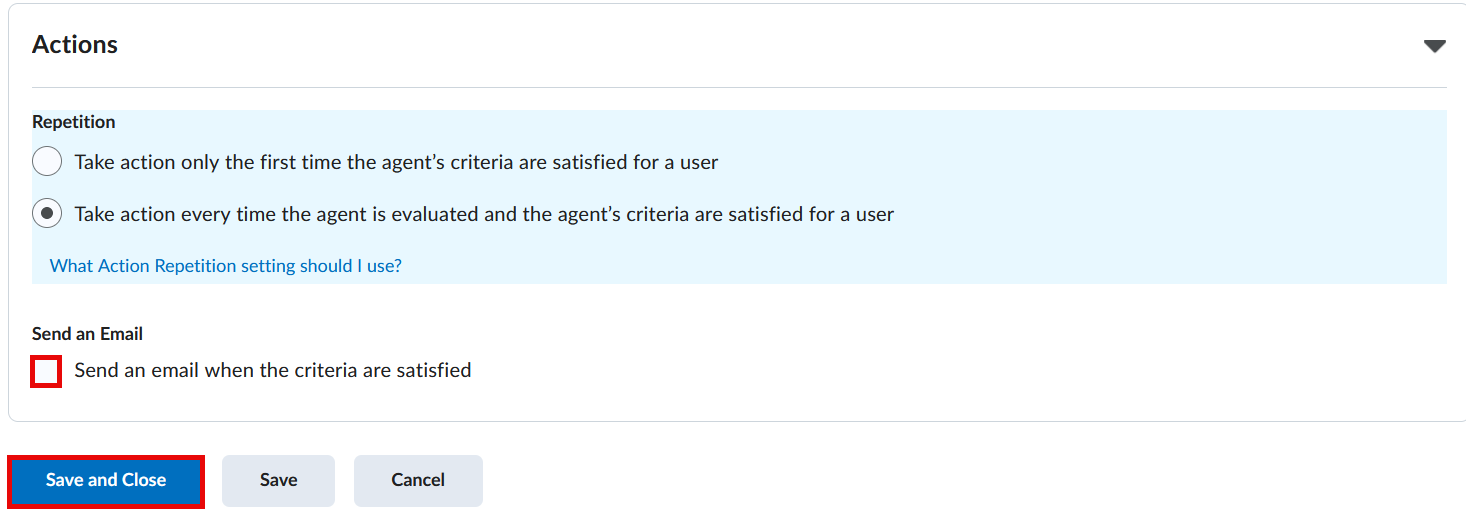
- Click Save and Close.
Edit an Intelligent Agent
- Navigate to Edit Course on the course navbar and choose Intelligent Agents under the Communication section.
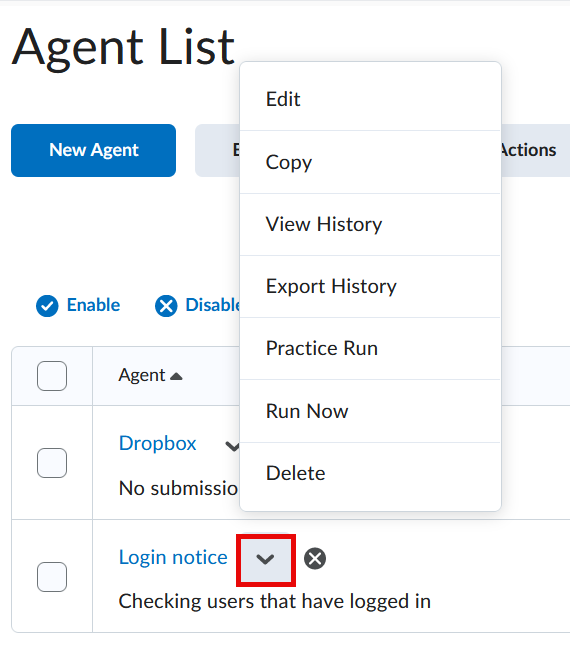
- Select Edit from the drop-down menu of the agent’s name.
- Edit any of the fields: name, description text box, category, status, Scheduling section, Criteria section, Actions section.
- Click Save and Close.
- Use the Bulk Edit button if you would like to edit more than one agent at once for the following: title, category, active/inactive status.
Copy an Intelligent Agent
- Navigate to Edit Course on the course navbar and choose Intelligent Agents under the Communication section.
- Select Copy from the drop-down menu of the agent’s name.
- A duplicate of the agent will appear with ‘Copy of’ in the title of the agent’s name.
- Select Edit from the drop-down menu to edit the name of the agent as well as other fields.
Note: Copied agents are automatically disabled. This also applies to the case of copying from one course site to another.
Delete an Intelligent Agent
- Navigate to Edit Course on the course navbar and choose Intelligent Agents under the Communication section.
- Select Delete from the drop-down menu of the agent’s name.
- A confirmation popup will appear asking if you want to delete the agent. Click the Delete button to confirm.
Note: An alternative way to delete the agent is by selecting the check box(es) and clicking the delete icon located above the agent list. Deleted agents do not run if they have a recurring schedule.
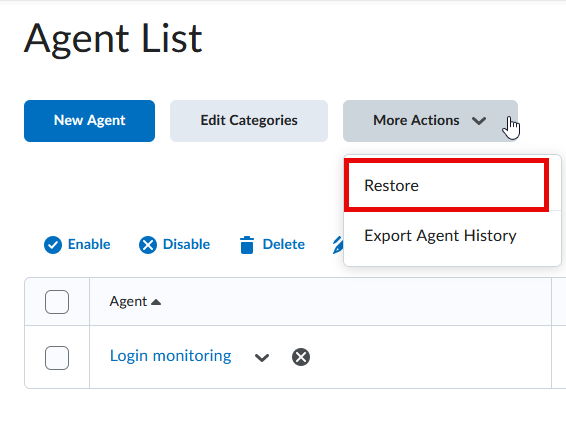
Restore a Deleted Intelligent Agent
- Navigate to Edit Course on the course navbar and choose Intelligent Agents under the Communication section.
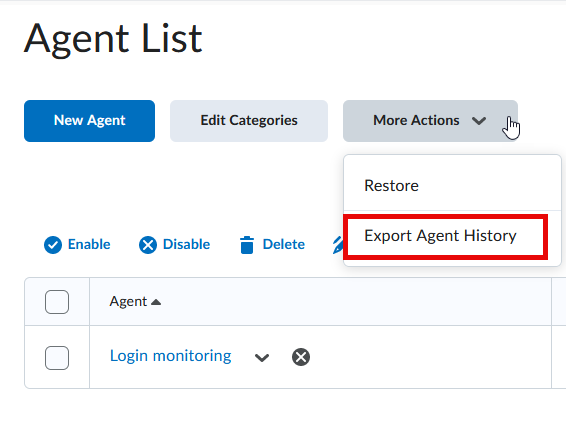
- Select Restore from the drop-down menu of More Actions.
- Click the Restore button for the agent(s) you would like undeleted.
Filter Intelligent Agents
- Navigate to Edit Course on the course navbar and choose Intelligent Agents under the Communication section.
- Select from choices available from the View: drop-down menu (e.g., Disabled).
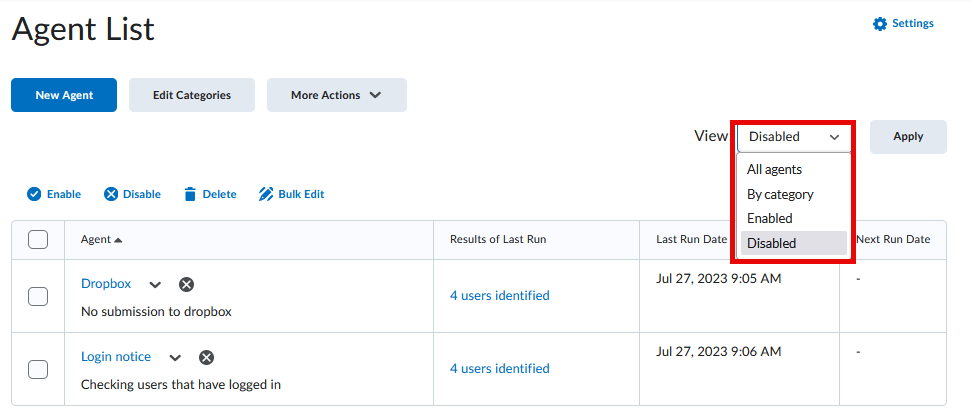
- Click the Apply button to trigger the search.
Run an Intelligent Agent
Export Agent History to CSV
- Navigate to Edit Course on the course navbar and choose Intelligent Agents under the Communication section.
- Select Export History from the drop-down menu of the agent’s name.
- Select an agent.
- Select dates.
- Click Export
Note: To quickly select all agents, navigate to the More Actions button and select Export Agent History.