Accessing Schedule Planner
Schedule Planner is a tool that will assist students in building the best schedule based on their needs. Courses can be scheduled according to degree requirement needs and time can be blocked from scheduling for work, athletic practice, or any other breaks. The schedule can be highly customizable.
Accessing Schedule Planner
Expand all | Collapse all
Step 1: Log in to CheckMarq and click or tap the Manage Classes tile.
Follow this link for details on how to navigate in the CheckMarq Student Home (formerly known as Student Center).
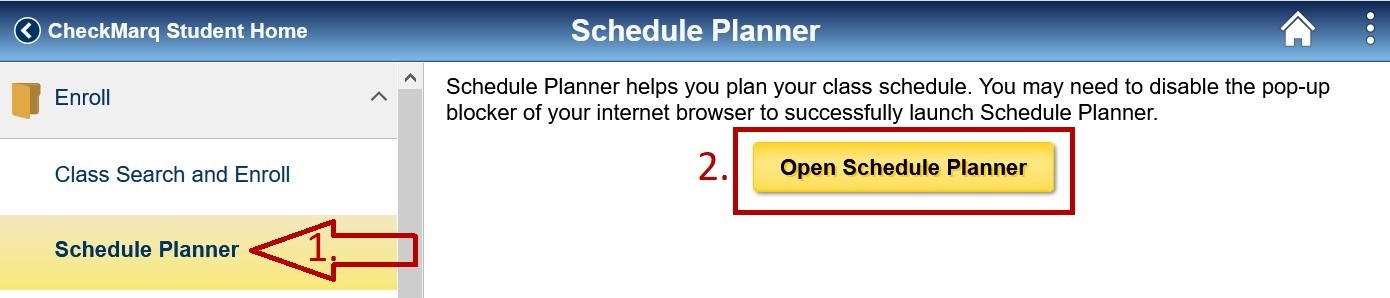
Step 2: Open Schedule Planner
Select Schedule Planner from the left-had navigation menu. Click the Open Schedule Planner button to open Schedule Planner in a new window. Be sure you have pop-ups allowed on your browser.
Undergraduate and Graduate School of Management students also have the option of adding required classes to their planner through the course details link in their My Academic Requirements report. For more information on using this report, please see Degree Progress Reports.
Using Schedule Planner
The videos below walk through using Schedule Planner to build a class schedule, refine schedule options, register in classes, and make updates to a schedule. If you are new to Schedule Planner, it is recommended that you start with the Schedule Planner Overview.
Expand all | Collapse all
Video: Schedule Planner Overview
Video: Refining Your Schedule Options
Video: Schedule Selection and Registration
Video: Updating Your Class Schedule
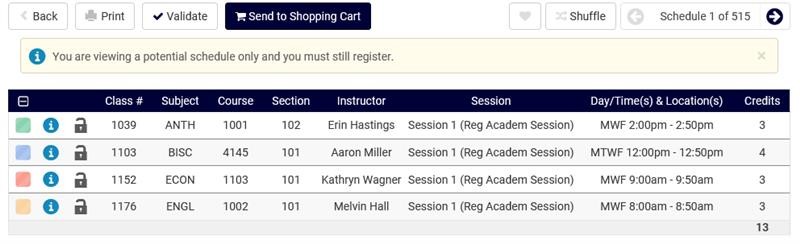
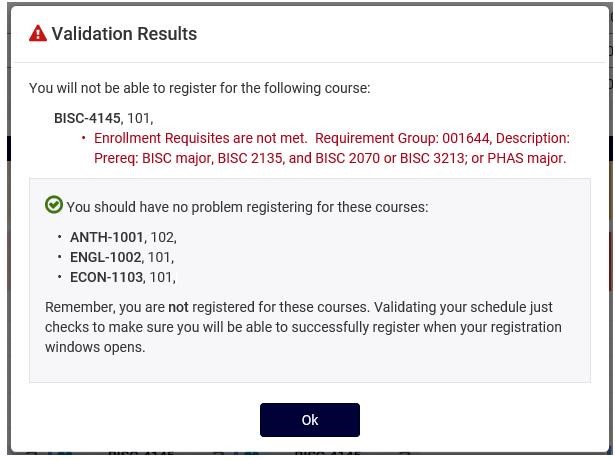
Schedule Planner Validate Feature
Prior to registration, Schedule Planner allows students to validate their schedules to ensure they will be able to successfully register when registration opens. This includes checking for prerequisites, registration holds and repeated classes. Schedule Planner will not allow students to generate schedules with time conflicts.
Expand all | Collapse all
Step 1: After schedules have been generated, click or tap a schedule to view it.
Step 2: Click or tap the Validate button at the top of the next page.
Step 3: When the potential schedule has been validated, a validation results box will appear with the details for each class indicating whether there are registration problems.